
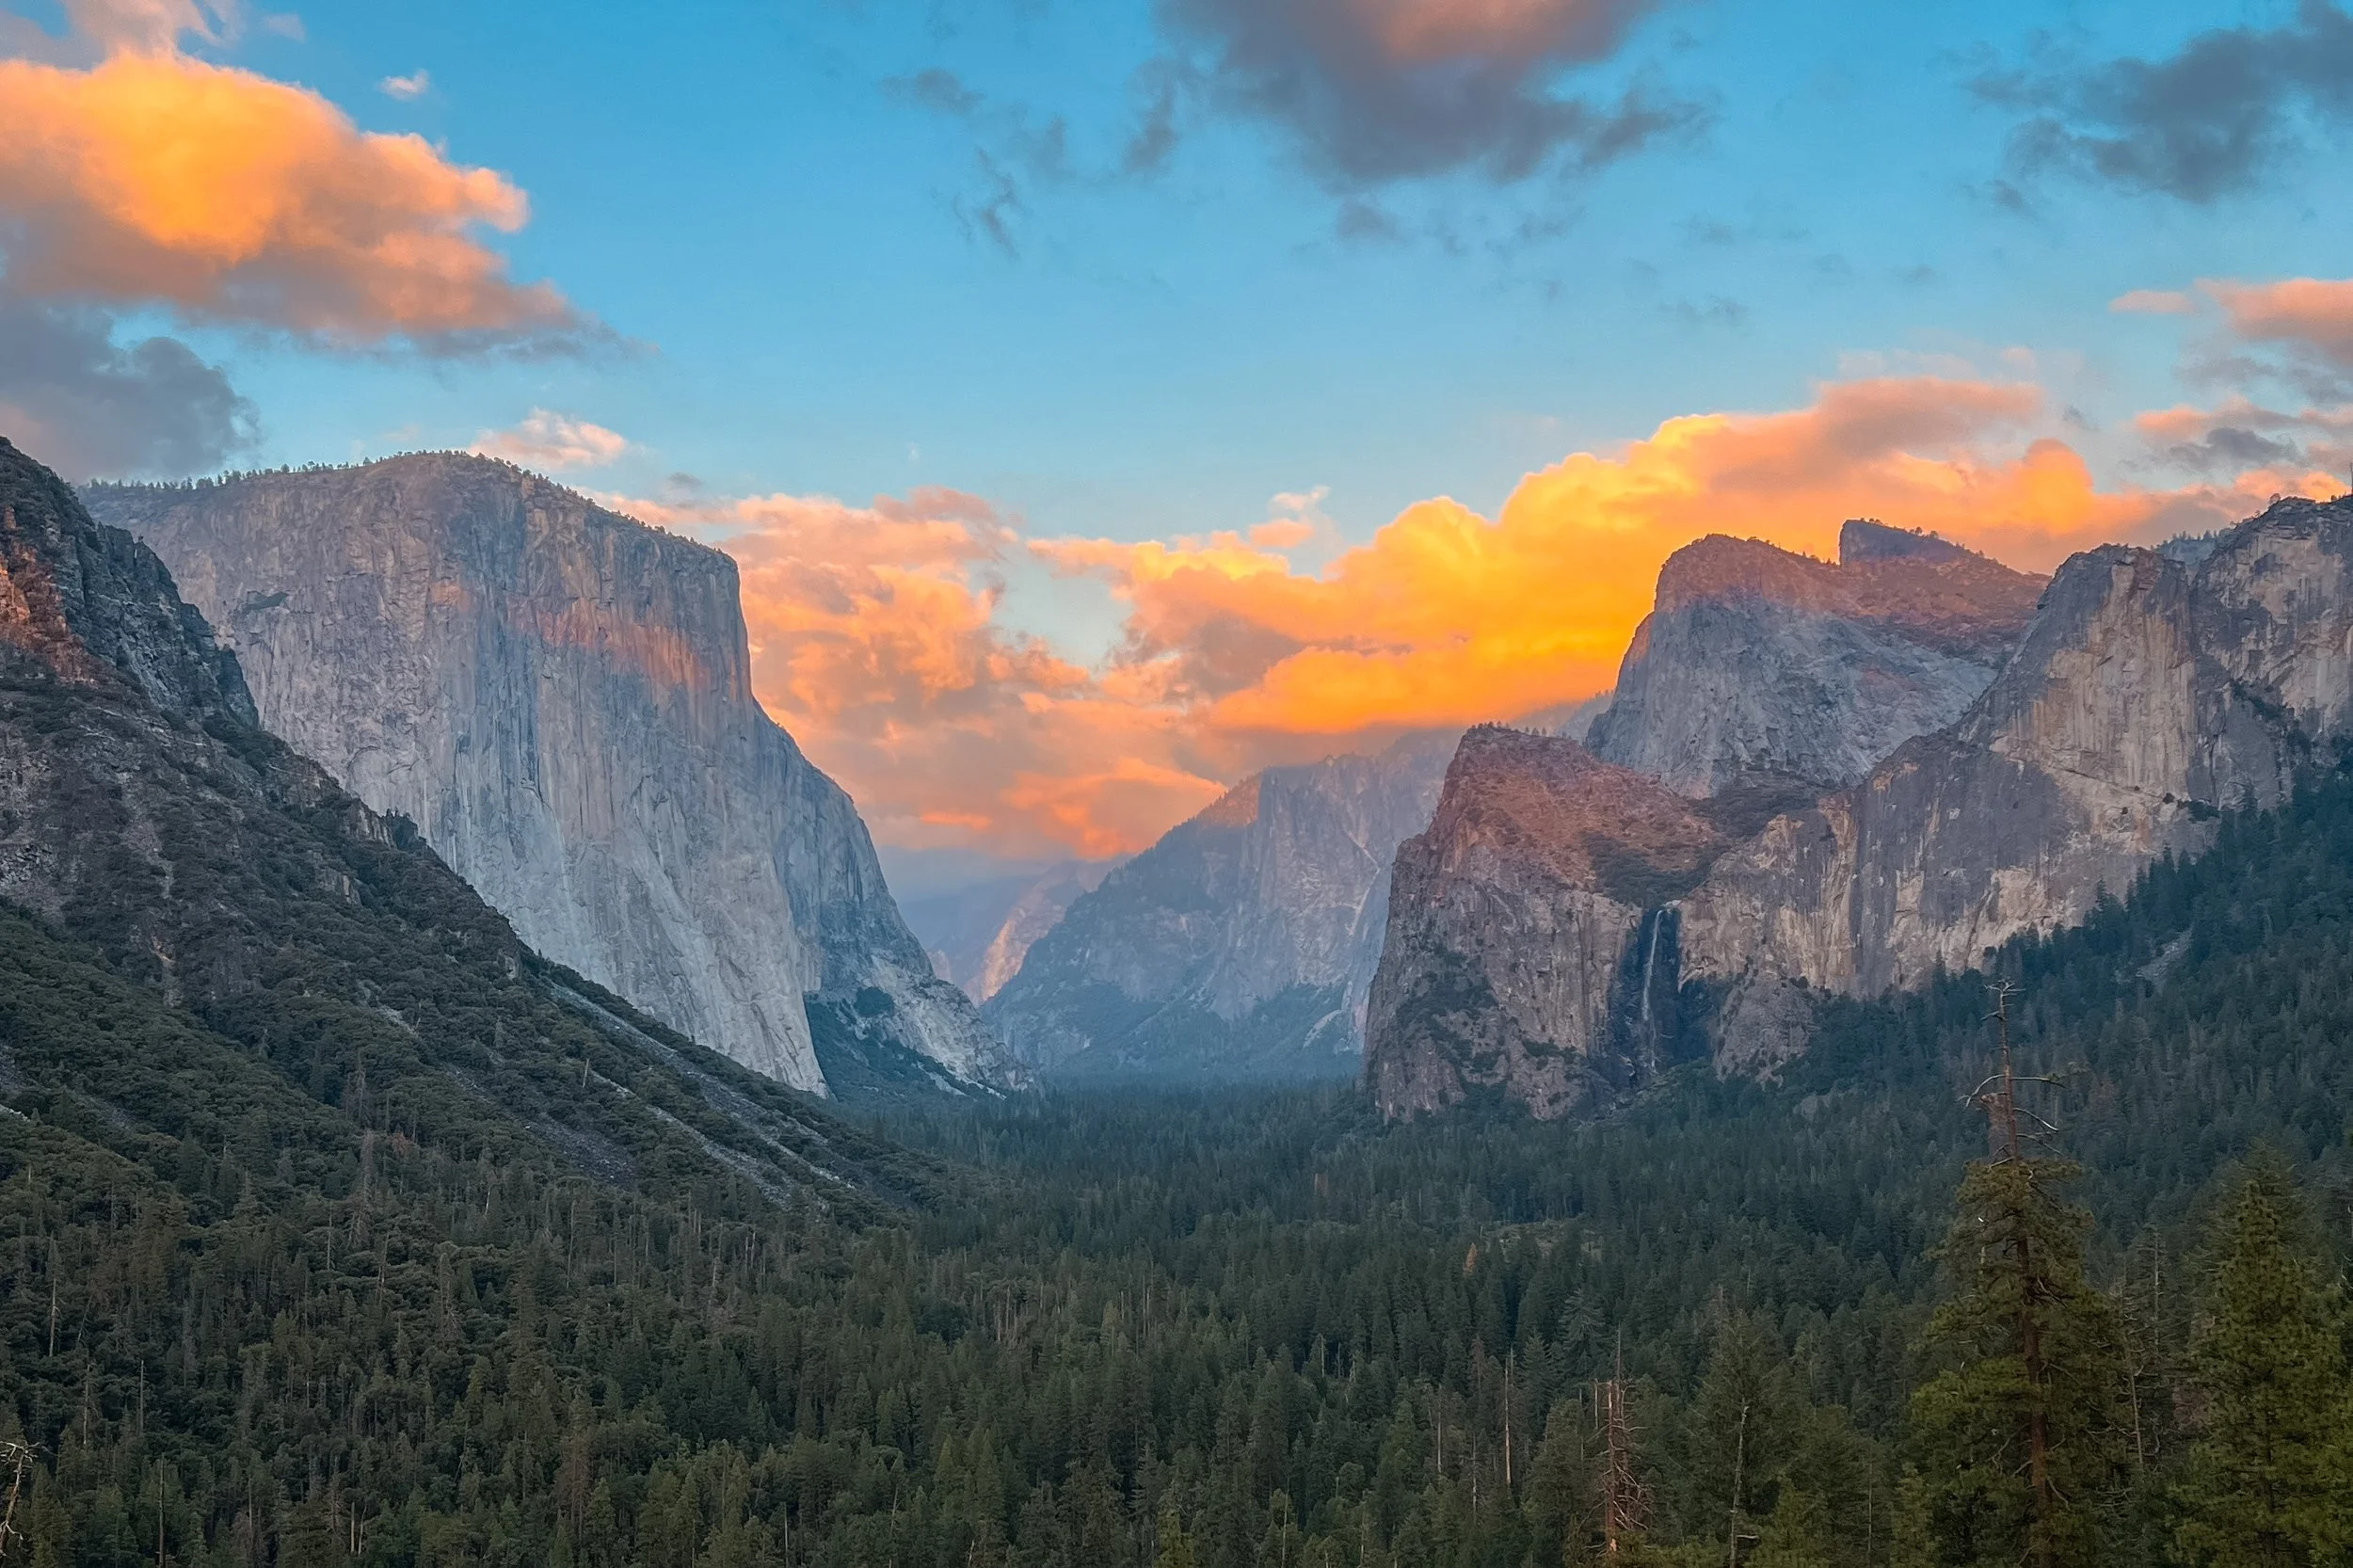
Top 5 Day Hikes in Yosemite National Park
Yosemite National Park. The land of awe-inspiring, towering cliffs, roaring waterfalls, peaceful meadows, and more. It’s pretty hard to find a bad view in the park, to be honest!
Yosemite has over 750 miles of maintained trail, with most of those deep in the wilderness. With all those miles of trail, it can be hard to prioritize and figure out which trails are the best to do. The good news is: almost any trail you choose is going to be awesome! But if you need a little helping hand, keep reading for my all-time favorite hikes in Yosemite.
Best Time to Hike in Yosemite
Yosemite is accessible year-round, but summer and early fall are the only parts of the year when Tioga Road is open. Tioga Road, aka Highway 120, is a high-elevation road that traverses the park from east to west. While most people who visit Yosemite National Park only visit Yosemite Valley, the Yosemite high country, accessible via trailheads on Tioga Road, offers even more terrain and sometimes even better hiking than the valley trails! The road usually opens sometime in June, once the winter snows have melted enough. You can view the historical open and close dates here, for planning purposes.
Being a Good Steward
It’s important to review Leave No Trace principles before recreating in these amazing places. If we don’t take care of our parks and public lands now, they won’t be here for us in the future. As a reminder, the Leave No Trace Principles are:
Plan ahead and prepare - this blog post is a great start! Even better would be going to the National Park Service’s website and reading the current conditions in the park so you know if there are any issues with the trails you want to hike.
Travel and camp on durable surfaces - don’t wander from the trail or cut switchbacks - doing so can lead to erosion on our trails. And if you’re backpacking, make sure you camp at least 100 feet from trails and water, and on sand, dirt, or rock - no grasses.
Dispose of waste properly - always pack out your trash - yes, even banana and orange peels, and make sure you bring the right stuff for going #2 properly.
Leave what you find - Don’t pick wildflowers or collect rocks in the parks. There is also the possibility of finding Indigenous artifacts in the park. Leave them where you find them so others can enjoy the find as well.
Minimize campfire impacts - Yosemite has very strict fire rules. Always be aware of the fire restriction stage in place. In the backcountry, fires are prohibited above 9,000 ft and must be contained to already-made official fire rings if fires are allowed. If you have a legal fire, be sure you have enough water to put it completely out, and consider not having a fire in the first place.
Respect wildlife - Do not feed any wildlife, and give them plenty of space to be wild animals. Bear canisters are required for food storage while backpacking in Yosemite, and bear spray is illegal in the park.
Be considerate of other visitors - Be kind, don’t play your music out loud, and understand that everyone has their own reason for visiting and enjoying our parks.

Nevada Fall, Liberty Cap, Mount Broderick, and Half Dome from the John Muir Trail.
The Mist Trail
The Mist Trail might be one of the most famous (or maybe, infamous) trails in the country! It is a moderately difficult hike, mainly because of the very tall, and sometimes slippery, granite steps that lead you up to the top of Vernal Fall, and eventually, Nevada Fall. Even though it’s a challenge and can be dangerous on a crowded summer day, I still think it is worth it to hike at least once.
The Mist Trail is usually done as a loop with the John Muir Trail, to get some different views on the way down. The nice thing about this trail is that there are a few options for hiking it. The most popular loop is to begin at the John Muir Trailhead at the Happy Isles shuttle stop. Once you cross the paved footbridge, you’ll continue up on the Mist Trail, and continue on that trail to the top of Nevada Fall. Then, you’ll loop down on the John Muir Trail and return to the trailhead. Personally, I’m not the biggest fan of the Mist Trail scenery after Vernal Fall. I prefer to take the Mist Trail to the top of Vernal Fall, then the Clark Point Connector to the JMT, and take the JMT to the top of Nevada Fall. I then take the JMT all the way back to the trailhead. One of my favorite views of Vernal Fall is from Clark Point. Whichever way you decide to hike is fine, but I really do not recommend hiking downhill on the Mist Trail between Vernal Fall and the footbridge. This is because the cross-traffic favors uphill hikers, and due to the large amounts of people on the trail combined with gravity, hiking downhill on this part of the trail could lead to more falling accidents, which could be deadly.

Vernal Fall from Clark Point
Distance: 8 miles roundtrip
Elevation gain: 2,000 feet
Difficulty: Moderate - strenuous
Pets allowed: No
Trailhead location: Happy Isles in Yosemite Valley. Note: you cannot park directly at the trailhead. Park at the Trailhead parking lot or at Curry Village Overflow, or take the park shuttle. – get directions on Google Maps

North Dome
I would describe North Dome as a super underrated hike! While the hike itself isn’t crazy exciting, the views at the end are pretty amazing and give you a different perspective of Half Dome than the classic views from the Valley Floor or Glacier Point. There is also a cool detour to Indian Arch along this trail, which is the only known natural granite arch in the park!
You can read about my backpacking trip to North Dome here.
Distance: 9 miles roundtrip
Elevation gain: 2,000 feet
Difficulty: Moderate
Pets allowed: No
Trailhead location: Porcupine Creek Trailhead on Tioga Road. – get directions on Google Maps

Half Dome as seen from Clouds Rest.
Clouds Rest
Clouds Rest is one of those bucket-list hikes that is worthy of a top spot on those lists. The trail starts by switchbacking up to the Sunrise Lakes junction through a sparse forest. You’ll have views to the north of Mt. Hoffmann and Tuolumne Peak before ducking back into the forest until you reach the next trail junction, which opens up to views of Moraine Dome and distant peaks of Southern Yosemite. The “spine” of Clouds Rest is a moderately narrow band of rock that can definitely feel scary if you have a fear of heights, but that spine leads to the top of the peak, with stunning views of Half Dome and Yosemite Valley stretched out below you.
You can hike to Clouds Rest from Yosemite Valley as well, but the elevation gain is about double the amount from Tioga Road, and a much longer hike too. But, it is the only way to get to Clouds Rest if Tioga Road is closed.
Distance: 12-18 miles roundtrip
Elevation gain: 3,000 - 6,000 feet
Difficulty: Strenuous
Pets allowed: No
Trailhead location: Sunrise Lakes Trailhead on Tioga Road, on the west side of Tenaya Lake. – get directions on Google Maps

Taft Point & El Capitan
Taft Point & the Fissures
Taft Point is a really nice hike along Yosemite Valley’s south rim. It is a much more mild hike than others on this list, and one of the best easier hikes in Yosemite. You’ll hike through a Lodgepole and Jeffrey pine forest before dropping elevation to the rim of the valley. The views from around the point are a photographer’s dream - at sunrise or sunset. Be careful around the fissures: they are gashes in the granite where you can peer down and see all the way down to the valley floor! It sounds a little scary, but they are easy to avoid, so don’t be too worried.
Taft Point is only easily accessible when Glacier Point Road is open, which is usually from the end of April through the first major snowfall in the fall (October-November).
Distance: 2.25 miles roundtrip
Elevation gain: 375 feet
Difficulty: Easy
Pets allowed: No
Trailhead location: Taft Point Trailhead on Glacier Point Road. – get directions on Google Maps

Cathedral Lakes
Upper Cathedral Lake is one of my favorite places in all of Yosemite. I’ve backpacked to these lakes twice now, and would go back again and again! You’ll hike up a series of wooded switchbacks with minimal views for the first two miles, but it will all be worth it soon! There are two lakes here: Lower Cathedral Lake and Upper Cathedral Lake. They are both about 0.5 miles from the junction that you’ll reach before getting to the lakes. To soak up stunning views of Cathedral Peak, be sure to hike all the way to the south side of Upper Cathedral Lake. There is a lot of scrambling in the rocks you can do to get more of a birds-eye view of the lake. And when you feel like taking a dip, there are plenty of granite rocks right on the shore of the lake that are perfect for hopping off of and sunbathing on after.
Want to spend the night here? Read my backpacking guide!

Distance: 7.5 miles roundtrip
Elevation gain: 1,500 feet
Difficulty: Moderate
Pets allowed: No
Trailhead location: Cathedral Lakes Trailhead on Tioga Road. – get directions on Google Maps