
Backpacking to Yosemite's North Dome
Everyone has heard of Half Dome in Yosemite. It’s amazing and beautiful and the star of the show in Yosemite Valley. But there’s another dome, one that is a full dome, hanging out adjacent to Half Dome: North Dome. This rock feature looks unreachable from the valley floor, but it's actually a relatively easy hike - as long as Tioga Road is open for the season. Keep reading to learn more about how to backpack to some of the best views in Yosemite!
Note: Included in this blog post are links to the Outdoor Status permit notification website. These are affiliate links, and I will earn a small commission at no extra cost to you if you choose to participate in permit availability notifications. Thank you so much if you do use this service!

Trail Info + Stats
Where: Yosemite National Park
Miles: 9 miles
Elevation Gain/ Loss: 2,000 ft
Time to Complete: 2 days
Trail Type: Out-and-back
Permits Required: YES
Pets Allowed: NO
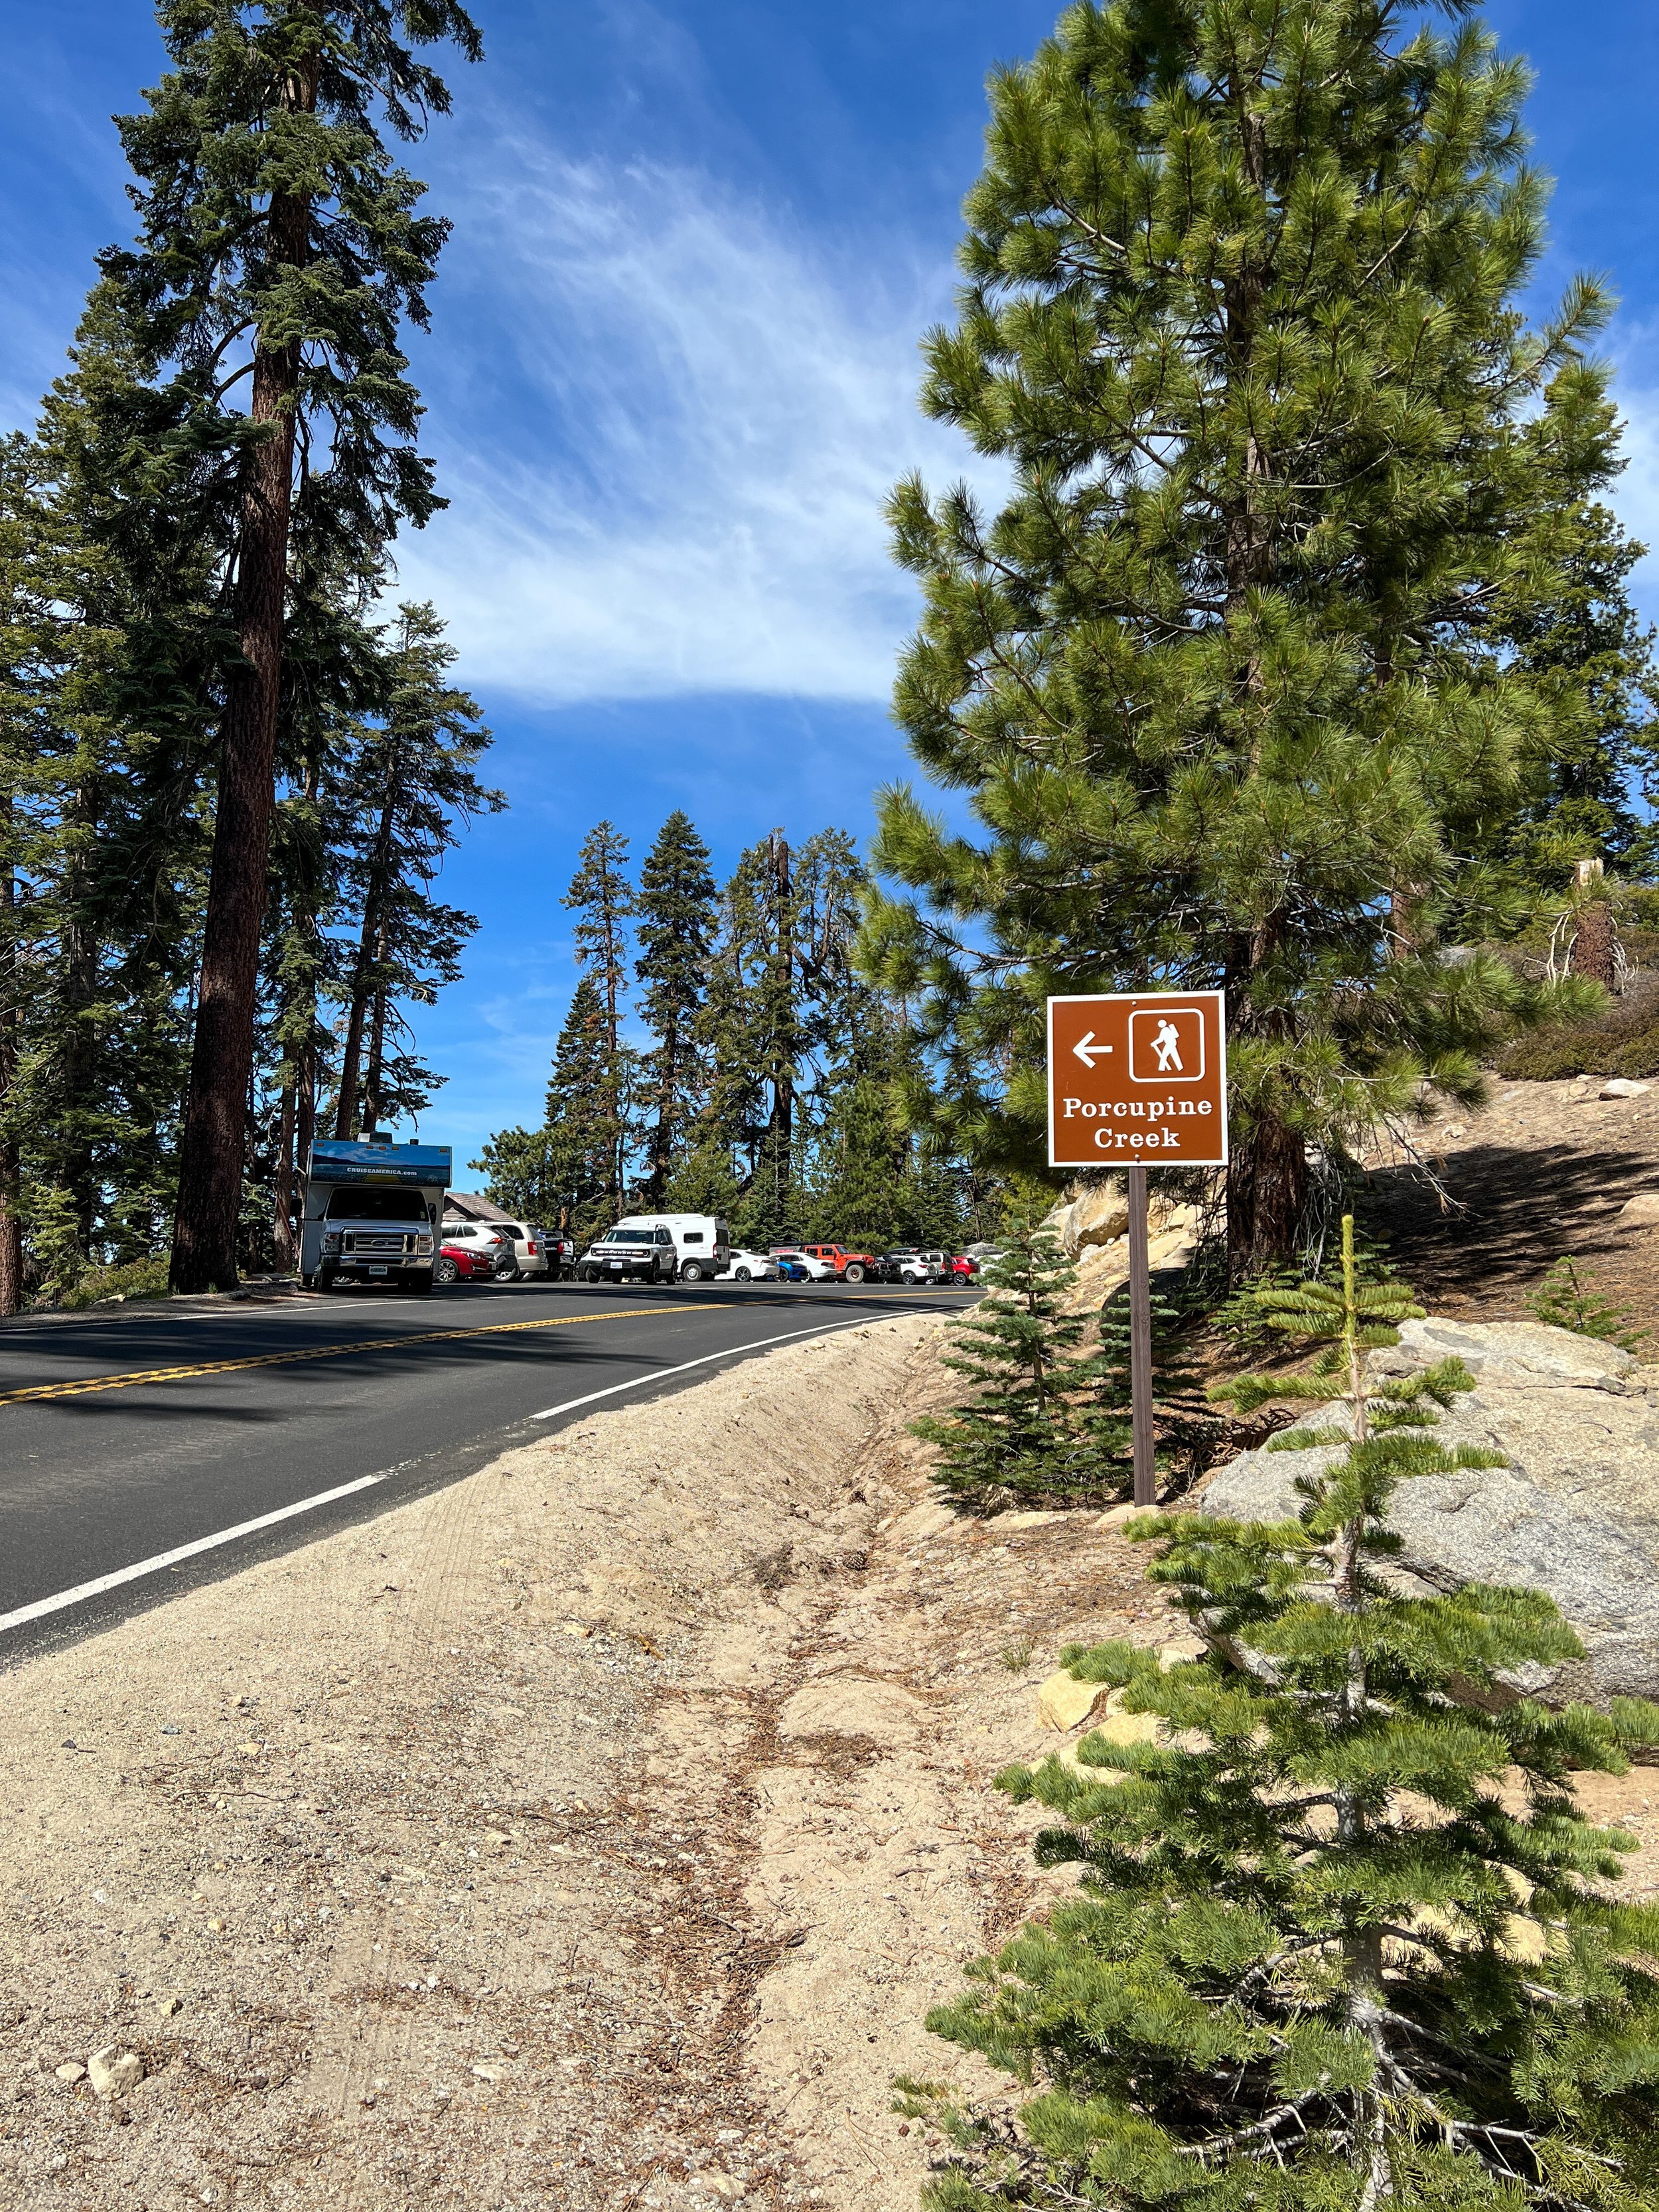
Trailhead: Porcupine Creek
Route Map via GaiaGPS

Route Stats
Itinerary & Trip Planning
Route Description
There are actually numerous ways to get to North Dome, which I will touch on. But the easiest and most direct way is a 4.5-mile hike from Tioga Road.
The trail begins in a moderately wooded forest right from the road. You’ll immediately start downhill on a path of mixed concrete and dirt. Early in the season, there are plenty of blown-down trees that you may have to circumnavigate and climb over. Less than a mile in, you’ll cross Porcupine Creek. This seasonal creek is an easy rock-hop in low water years and later in the season. Earlier in the season, you’ll have to balance-beam walk across downed trees to cross without getting your feet wet. The creek crossing itself did not seem dangerous and is definitely fordable, but it looked to be about calf-high in early June. There was also a small creek before and after the main crossing. Note that these creeks are pure snowmelt, and they will dry out by mid-summer if it was a low snow year.

The tree balance beam.

A jumble of downed trees across the trail.

Late spring is the perfect time to see Snowplants emerging from the ground!
After the creek crossings, the trail climbs a little bit to a large intersection with numerous other trails. Some of the signs were partially obscured by a large downed tree when I was hiking, but know that 4 different trails meet up here. You’ll want to follow signs to North Dome. The trail going back north is to Snow Creek and the trail to the southwest goes towards Yosemite Falls/ Yosemite Point. You could take this trail down and traverse along another trail to North Dome, which takes you by Lehamite and Royal Arch creek - good to note if you need more water than you originally thought. You will miss the spur trail to Indian Arch though.

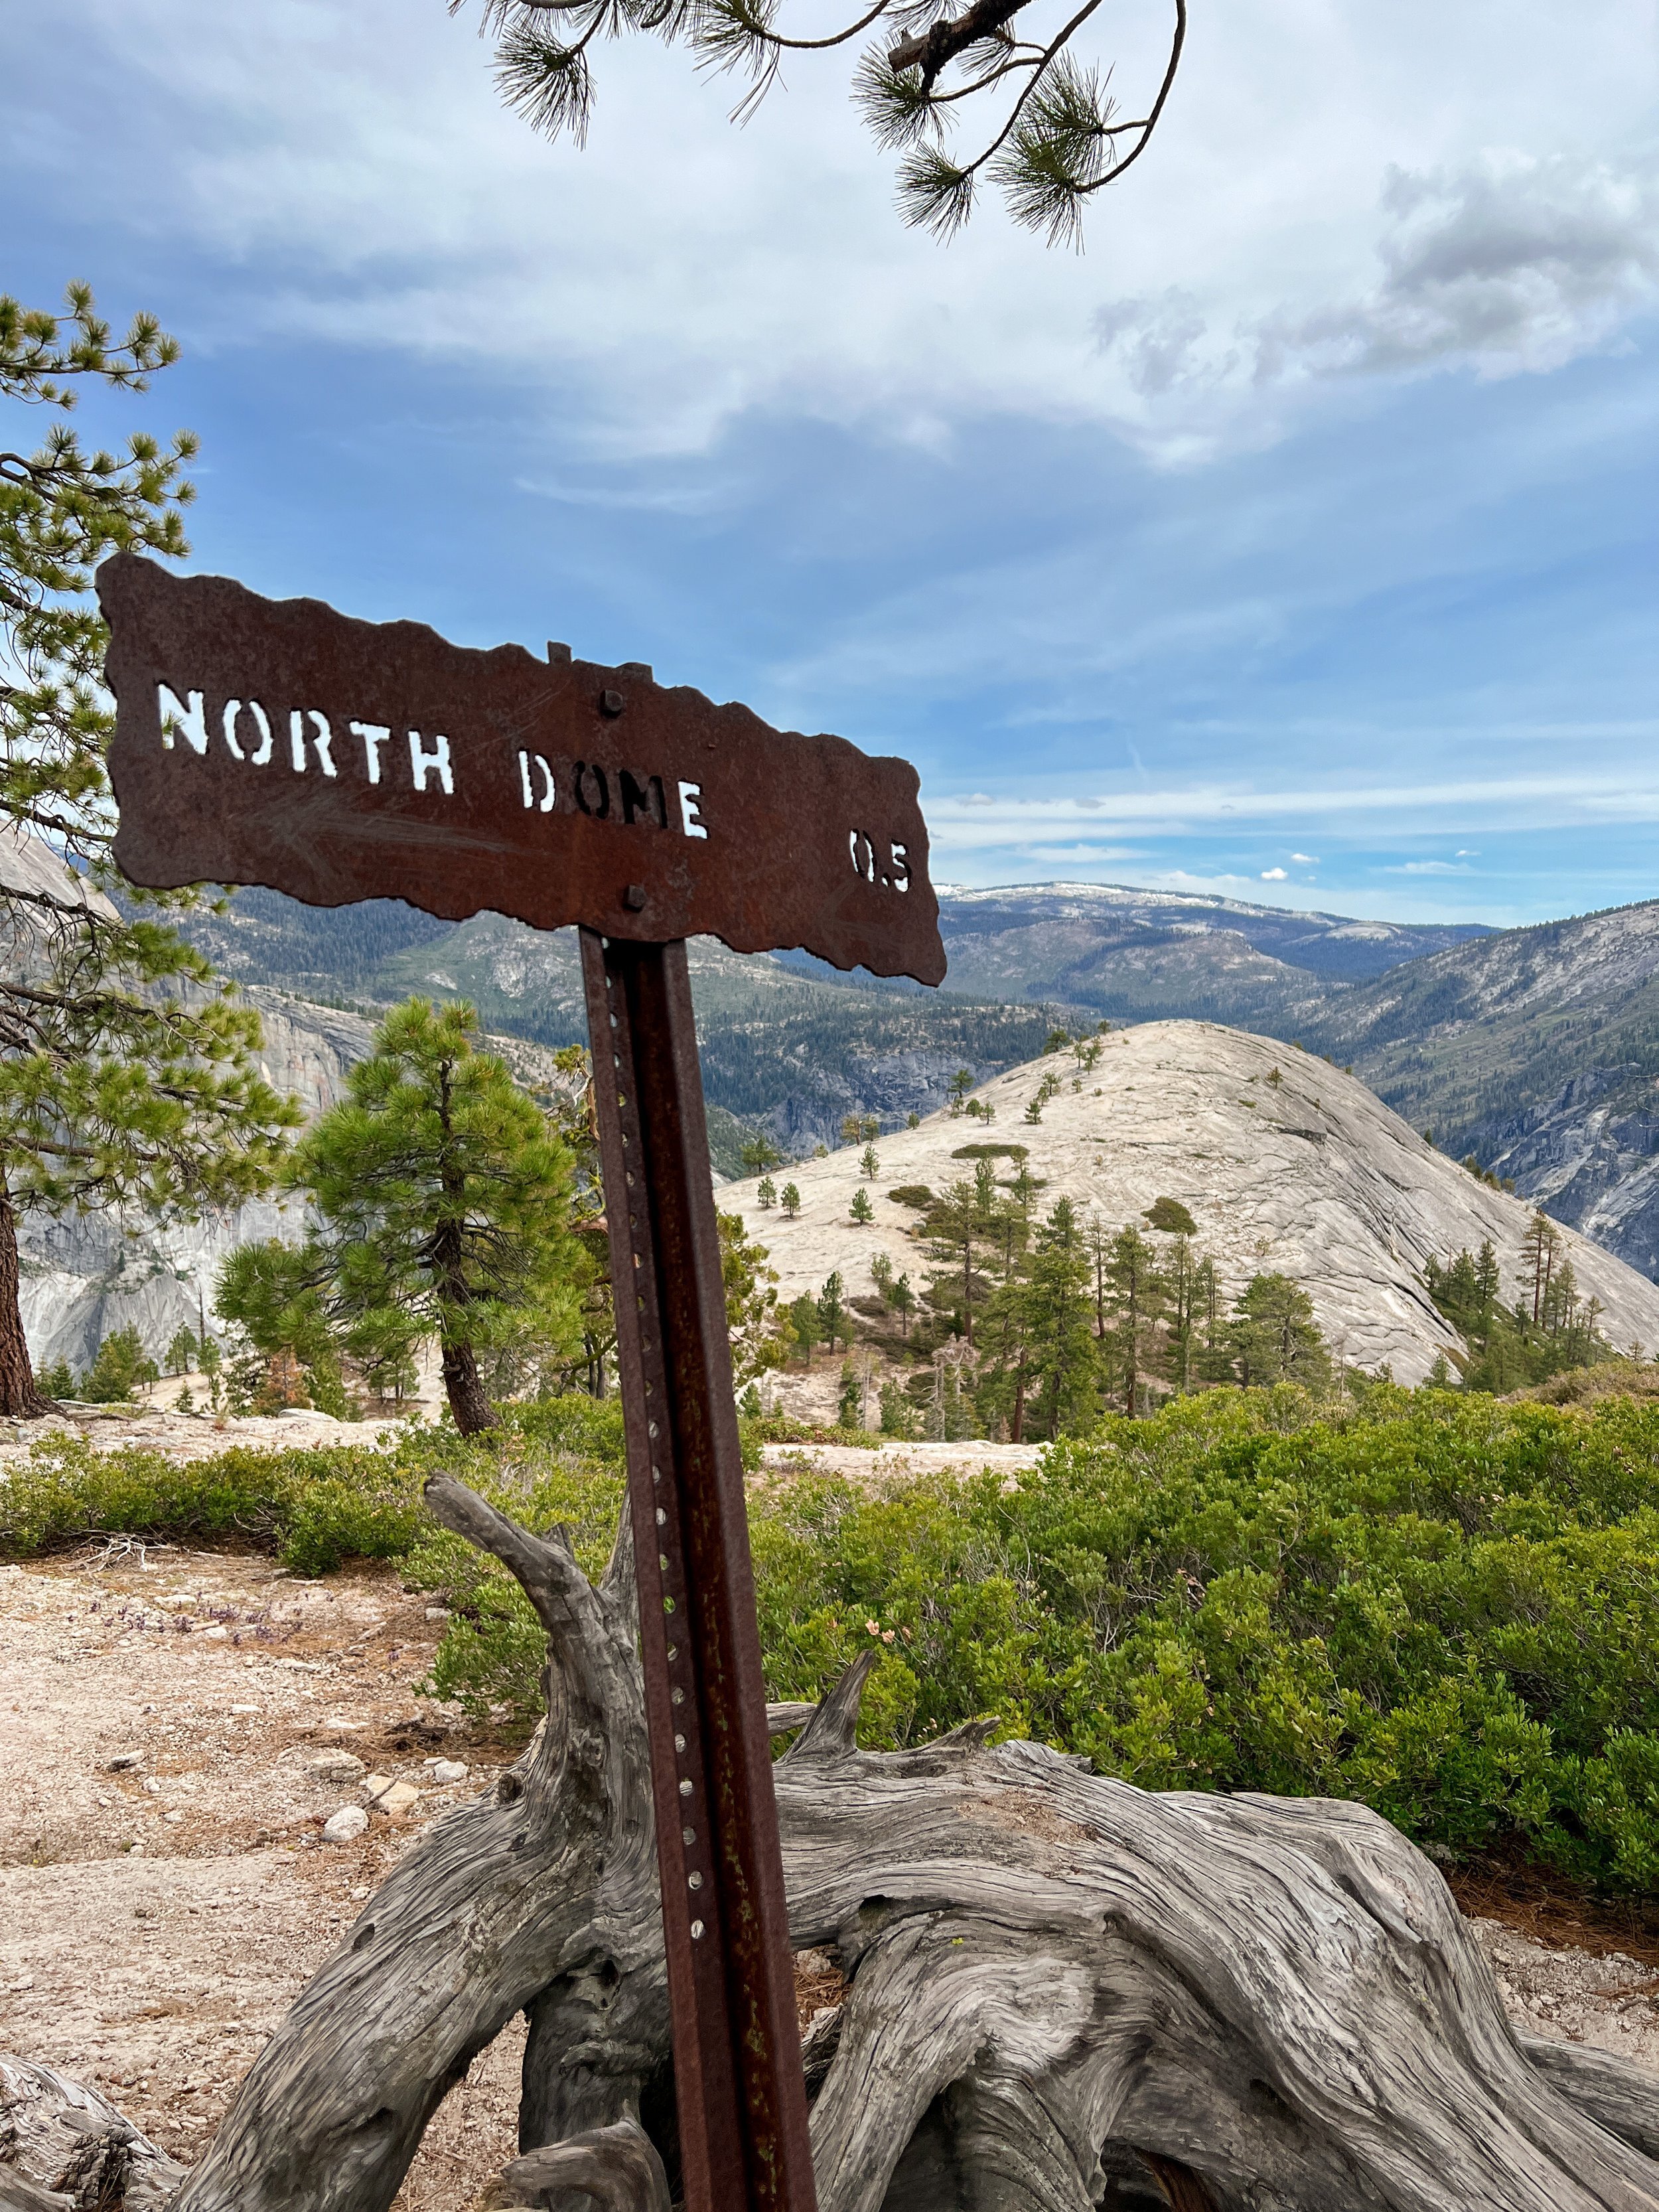
From the 4-way intersection, you’re about 2.5 miles from North Dome.

These beautiful patterns were actually deadly for this tree - from the Bark Beetle.

Yosemite is pretty well known for cool-looking rocks.
After this junction, the trail lightly climbs and descends through some more woods until the junction to Indian Ridge at a large, sandy gap. Here, you have the option to take the spur trail up to the only natural arch in the park! Be careful with stowing your packs though - the crows and squirrels in this area are relentless. We came back with our empty snack wrappers strewn around our packs. If you choose to leave your packs behind, I’d pull your bear canisters out of your packs and leave them, and make sure all snacks and empty wrappers are out of your backpack pockets. Otherwise, haul your packs up to the arch. The climb is pretty steep but definitely worth it! You might choose to do this on your return hike - whichever suits your plans better. But don’t leave it out!


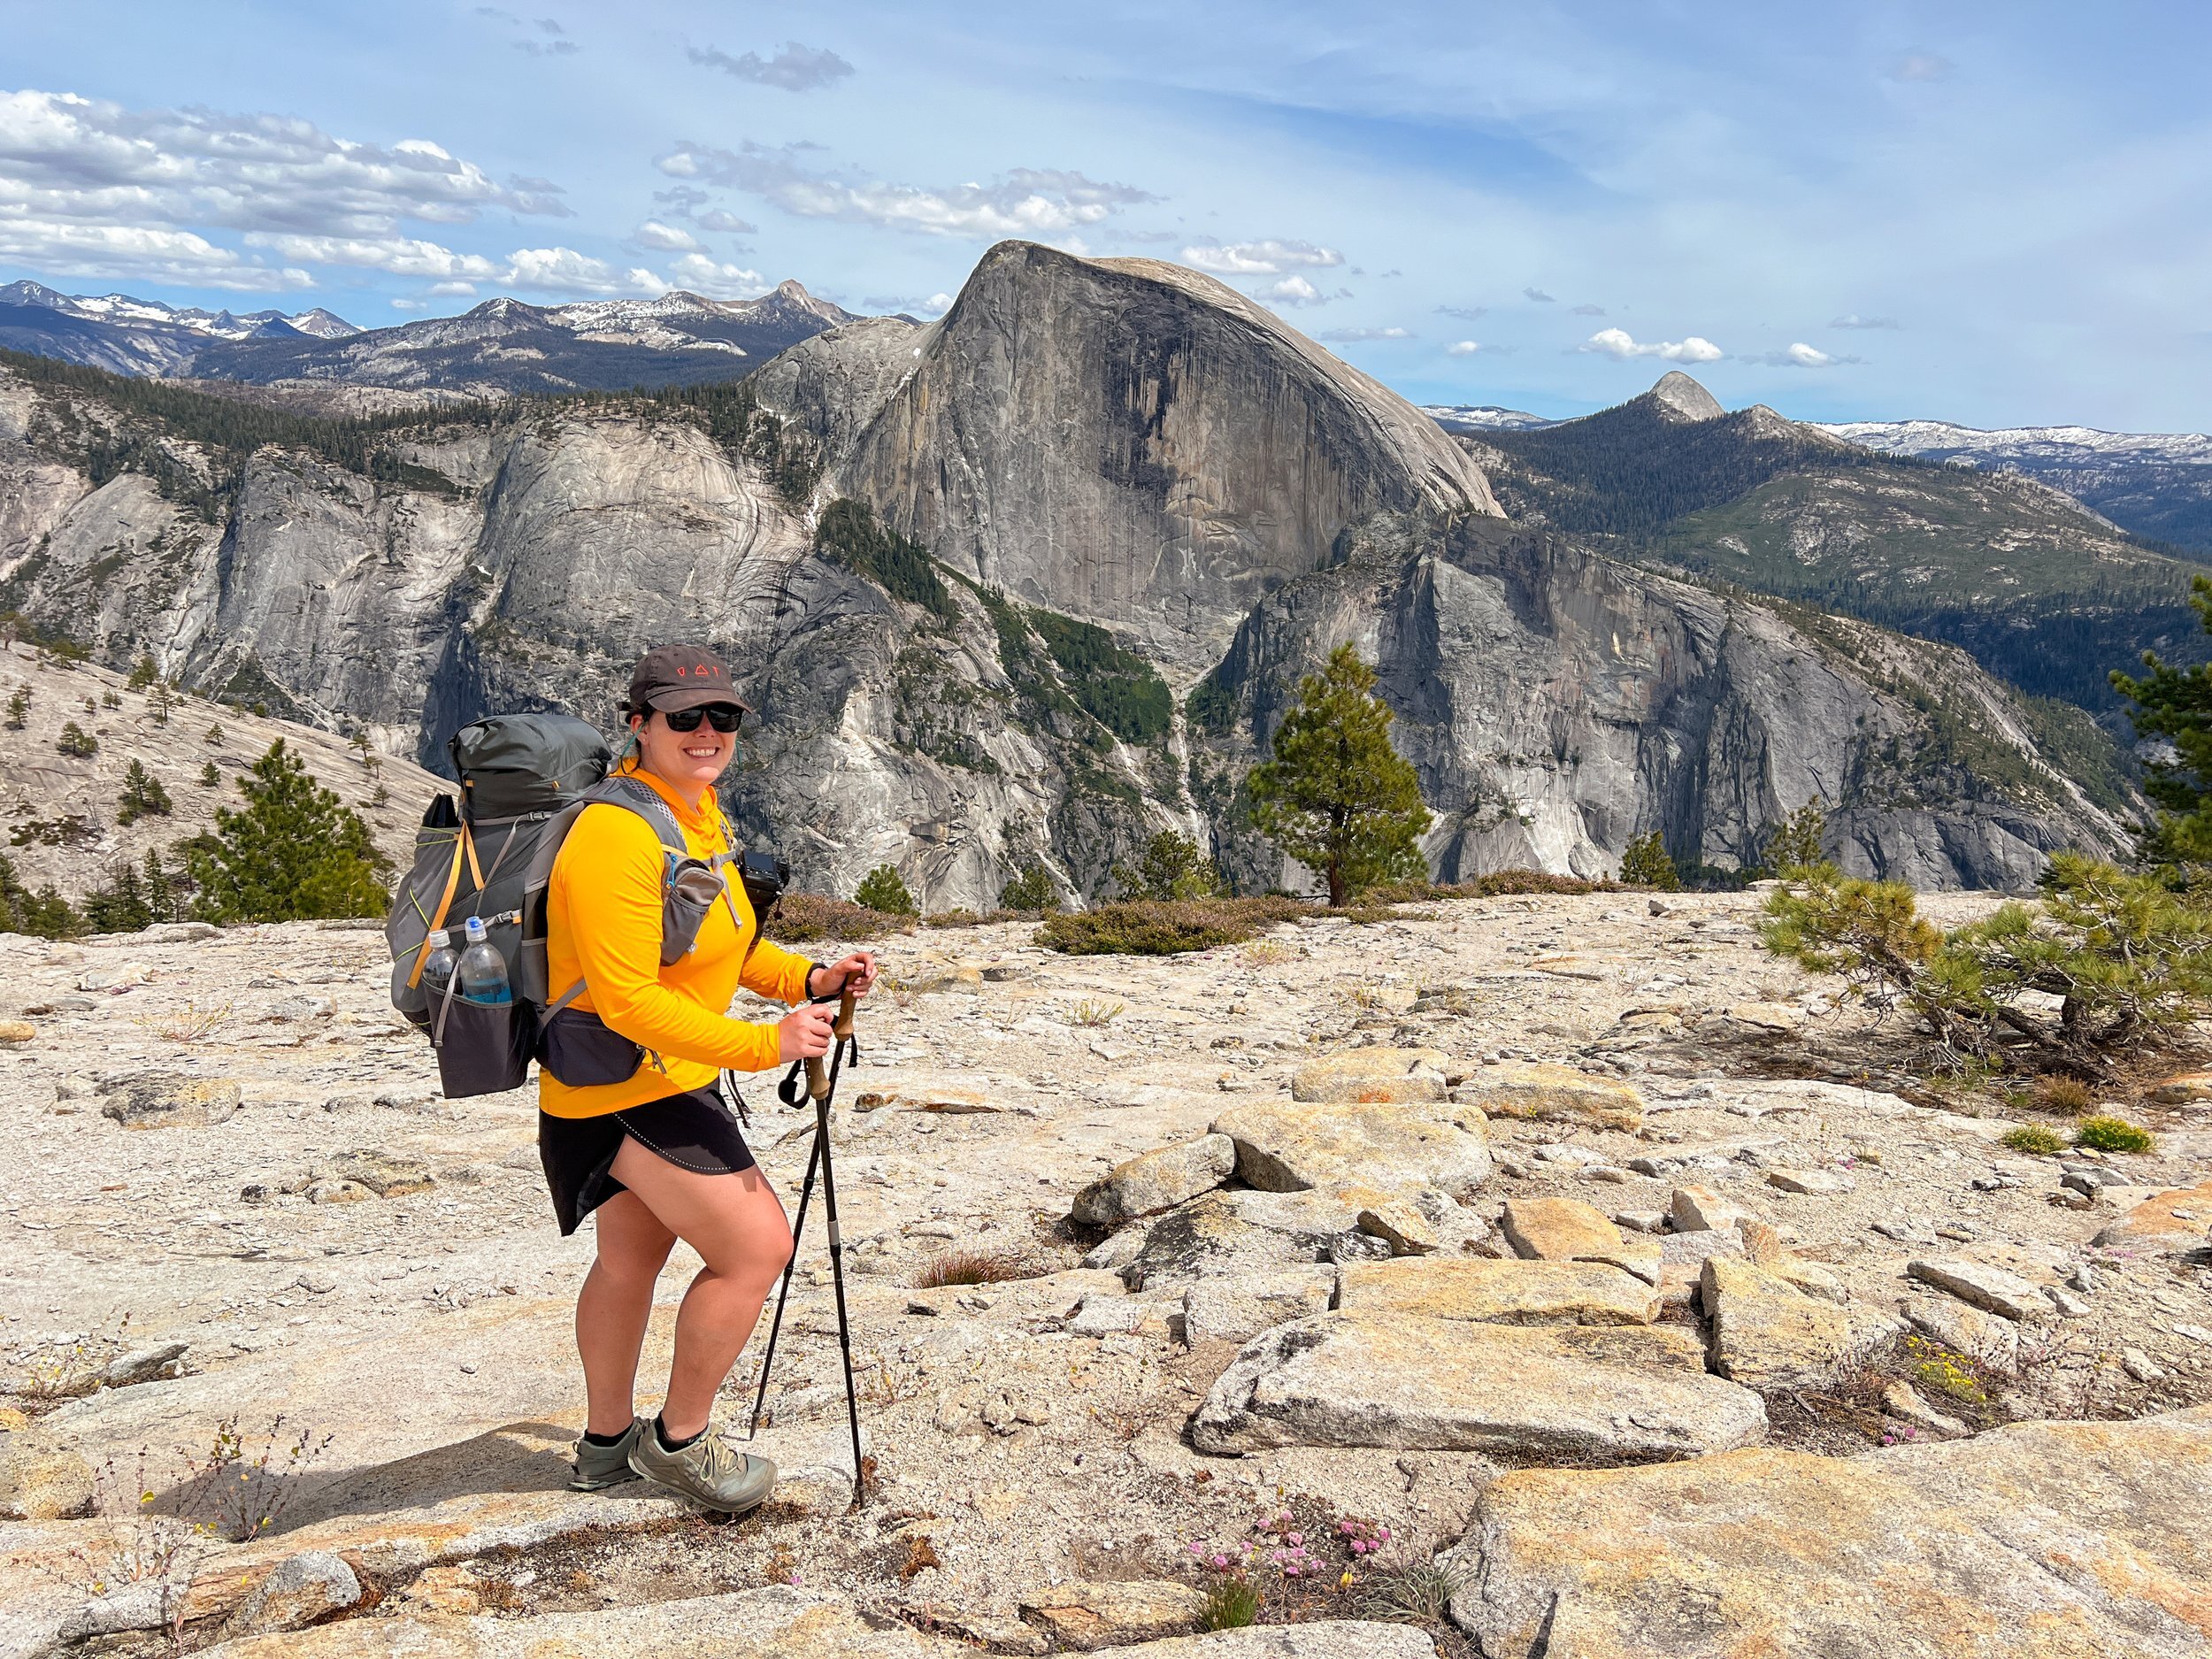
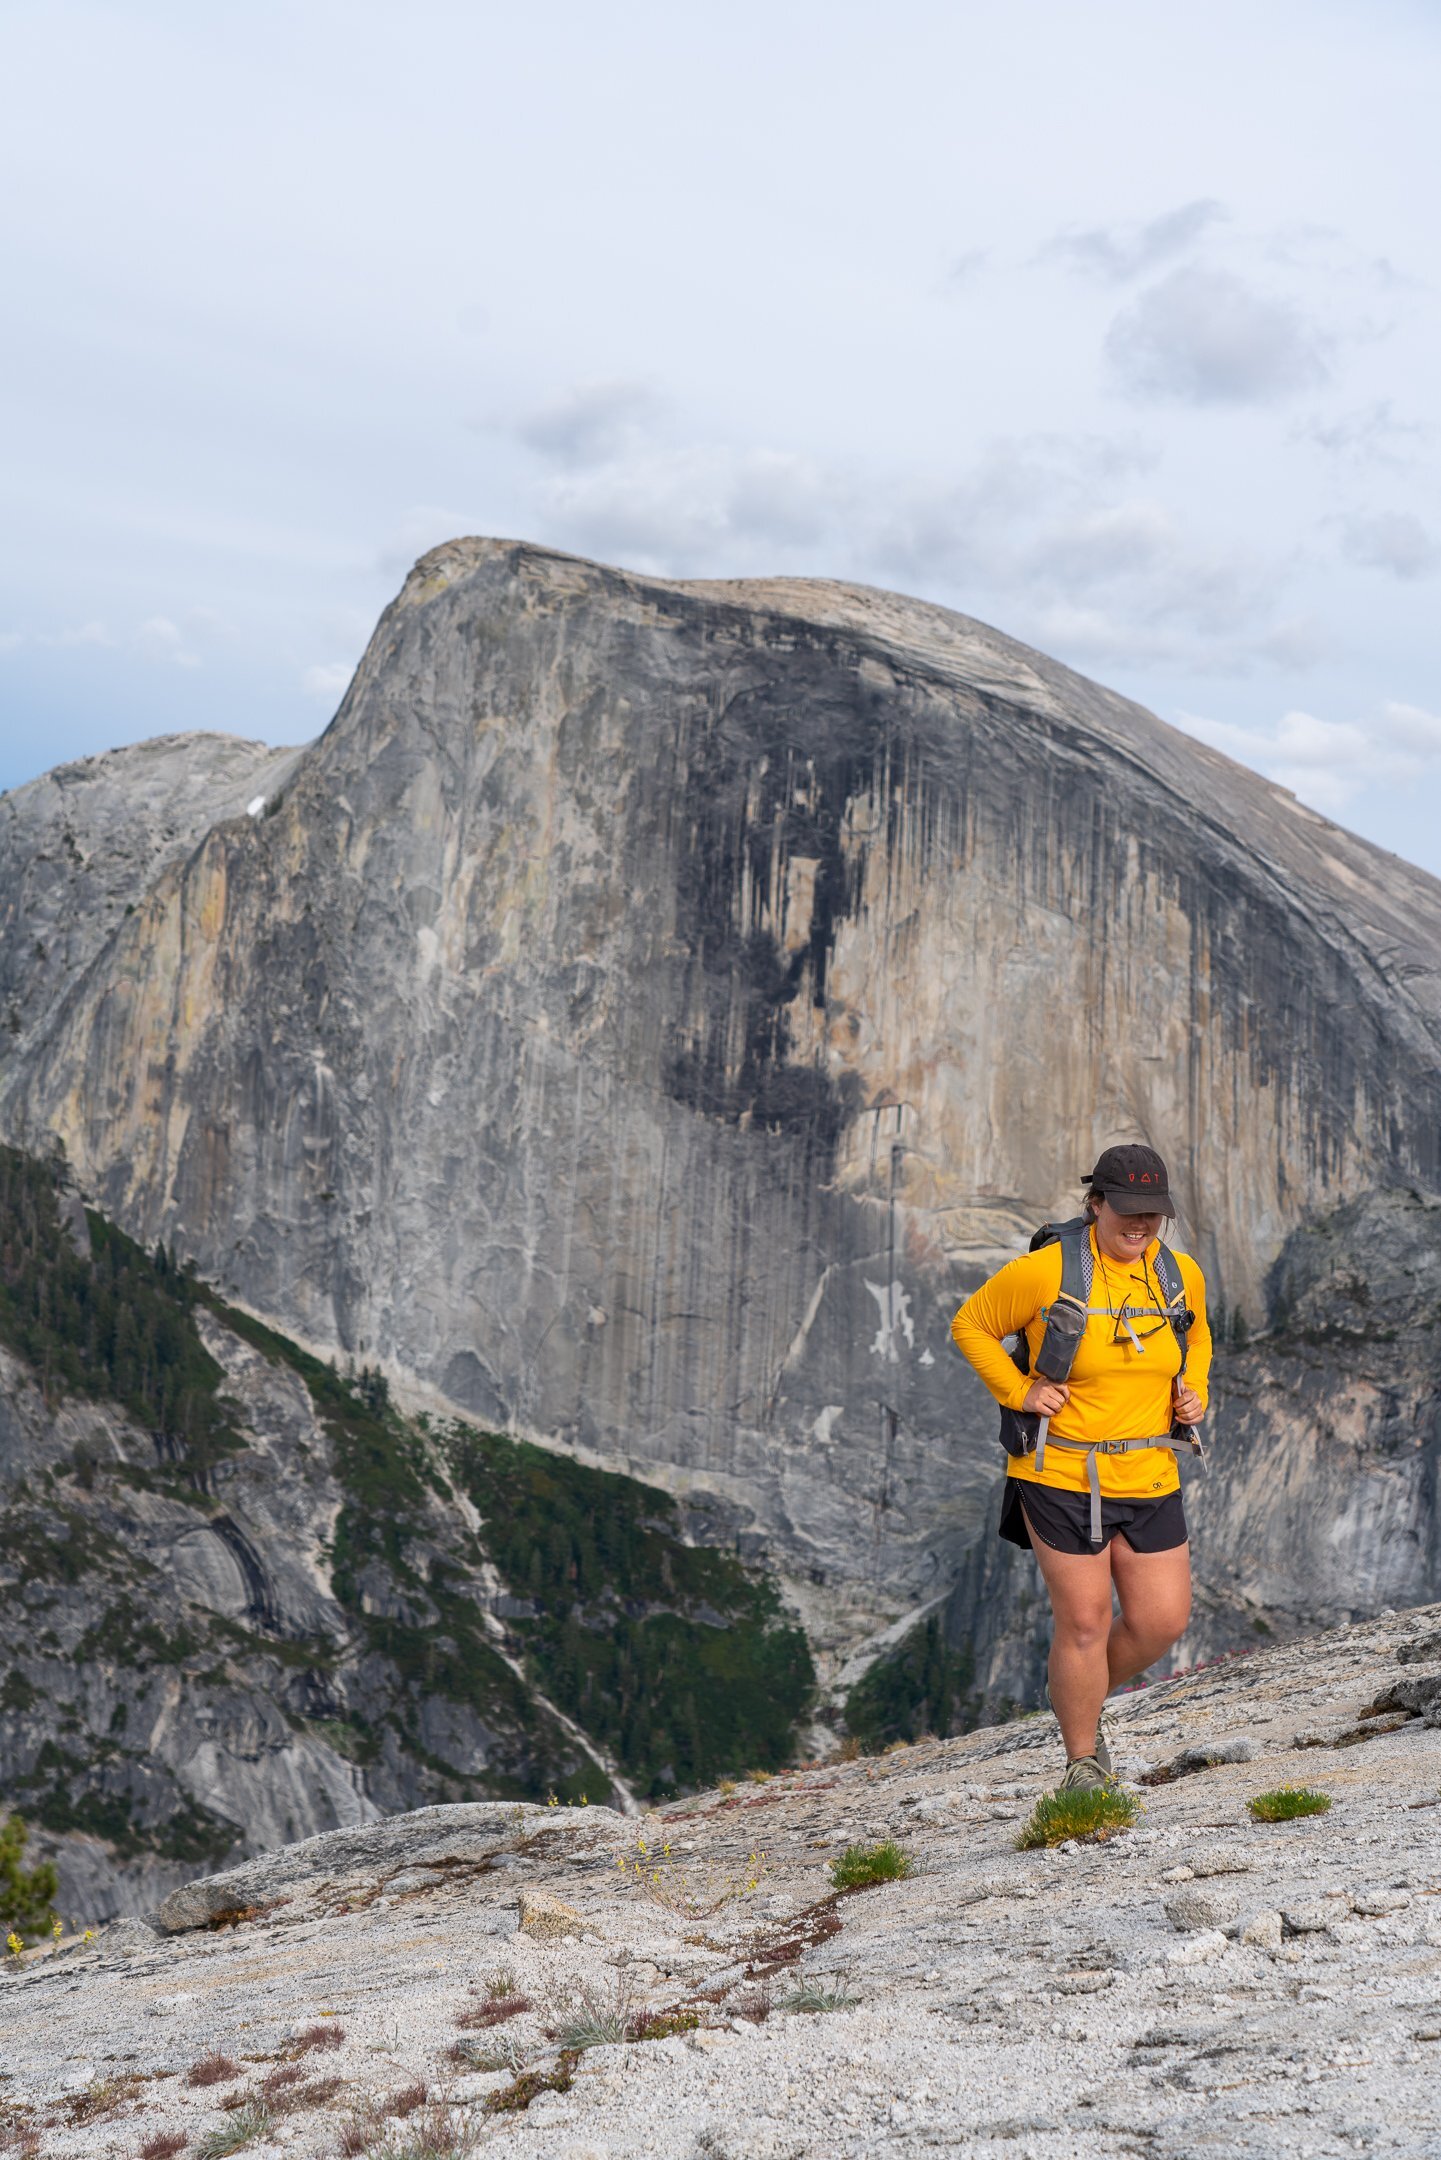
After the arch, continue walking on a flat, wide ridge. You’ll have views of Half Dome by this point, peeking out from behind the trees. Any spot along here is a great place to stop and have lunch with views of Half Dome. The views and spots are especially good right before the trail makes a steeper downhill plunge back into the woods. Enjoy the views, and hopefully good weather!

Illiouette Falls tucked away in a canyon.

Clouds Rest in the distance.
From the nice wide ridge, follow a few cairns down the side of the sloping granite - there is a pretty distinct tree growing right out of the rock for you to orient yourself. The trail hugs the granite slopes as the trail descends through forest and brush, before popping out at an exposed granite ridge with stunning views. Keep following this ridge south. The path is pretty obvious, but once the trail descends again, there are some areas where the trail doesn’t seem as clear. There is another trail sign at the intersection of this trail and the one that comes from Royal Arch creek, so you should be on the lookout for it. At this intersection, the trail turns east and continues to descend. This time, a little steeply along a granite wall and then back into some woods. Once you reach the woods, you’re almost there!
The junction with the trail to Royal Arch Creek & Yosemite Falls.

Some steep granite on the way down to the base of North Dome.

Looking at the ridge we descended, from North Dome.
There are two main camp areas at the base of the descent in the clearing past the woods - one to your left and one to your right. The camp area to the left really only has room for one tent in a flat spot - I was able to bit a 3-person comfortably here, but a 4-person could be a bit of a stretch. The campsite here has jaw-dropping views of Half Dome. The campsite on the right side of the trail has a lot more room for multiple tents and is ideal for larger groups. You can still see Half Dome from here, but not really from your tent door. Since camping is not allowed on North Dome itself, you’ll want to choose one of these spots to be closest to the dome. From here, it is only another quarter of a mile to the top of the dome, so the dome makes for a great sunrise or sunset spot, and the hike is pretty mild to the top.
This is an out-and-back hike, so you’ll retrace your footsteps on the way back to the trailhead and Tioga Road.

Other Routes
As I mentioned above, there are a few other ways to get to North Dome. The other common way to reach North Dome, especially when Tioga Road is closed, is via the Snow Creek Trail from the valley floor. This is a much longer and more intense hike, gaining about 4,000 ft of elevation. If you’re attempting this hike from the valley because Tioga Road is closed, you need to be prepared for winter conditions above the valley.

In the trees at the base of North Dome. Camping is to the right and left.

Permits
Yosemite wilderness permits can be obtained at recreation.gov. There is a weekly lottery for trips by trailhead 24 weeks before the date you wish to enter. In 2022, Yosemite also operated their first-come, first-served permits on recreation.gov, releasing them 1 week in advance of the entry date. They also release permits that are not claimed on the day of wilderness entry in person at wilderness centers, but it is almost guaranteed that there will not be any available for popular trailheads this way.
The entry and exit trailheads for this hike are Porcupine Creek.
Seasonality & Weather
The hike as described is only accessible in the summer when Tioga Road is open. Tioga Road usually opens sometime in June, but it is very dependent on the snow year. The road closes to overnight parking on October 15th. Click here to view the historical opening and closing dates for Tioga Road.
You can access North Dome via the Snow Creek Trail when Tioga Road is closed, however, this will usually mean the hike is in winter conditions and you should be prepared with winter gear like snowshoes, depending on the conditions.
This trail is mixed terrain, but a lot of it is very exposed. Be aware of lightning dangers, especially when on North Dome itself. Lightning storms can occur during the summer months in the Sierra, usually in the form of quickly-passing storms. Be very aware of the weather forecast.
Beginning as early as mid-summer, this trail could be entirely dry as far as water availability goes. Be sure to ask the rangers or look for up-to-date trip reports before going on your hike. There was a small, unmarked stream between the 4-way trail junction and the Indian Rock when I went in early June, but it shouldn’t be relied upon as a water source. There is a possibility you will need to carry all of your water in on this trail, so be prepared for that! You may want to consider cold-soaking or eating no-cook food for this trip, or just make sure you’ve got plenty of water! I carried in 4 L myself since I wasn’t sure of the water situation. That was enough for two days and one night for me.

Trailhead & Parking
The Porcupine Creek trailhead has a relatively large parking area, but is also super popular for day hikers, so it fills up fast. There is parallel parking off the side of the road opposite the trailhead that is legal to park on overnight if the lot is full. There is a pit toilet at the trailhead, but no water or other amenities.

Lodging Options
The Porcupine Creek campground is close by, and if it is open, can be a great place to stay before or after your trip. Due to weather and staffing issues, this campsite has not been open in years, so I wouldn’t rely on it for now. Click here to learn more about the campground.
Otherwise, having a wilderness permit enables your party to stay at a backpacker’s campground the night before your wilderness permit starts and the night it ends. The backpacker's campgrounds have been changing in recent years. Use this website for the most up-to-date information. The closest backpacker’s camp is White Wolf.
The fees are now $8 per person as of 2022, and you must have exact change.


A Dr. Seuss lodgepole grows out of the granite!


North Dome looks so different from behind than from the valley floor.
Pussypaws was speckled all over the base of North Dome.
