
High Sierra Trail Basics & Planning
Updated: December 2020
I hiked the High Sierra Trail in August 2019 with my best backpacking buddy: my mom. I had this smaller thru-hike on my radar since 2017 where I discovered the trail during some JMT research. With a PCT thru-hike on the horizon, I filed this one away for another time, thinking it would be a great hike to do with my mom since we love the Sierra so much. And, it did not disappoint!
Note: Included in this blog post are links to the Outdoor Status permit notification website. These are affiliate links, and I will earn a small commission at no extra cost to you if you choose to participate in permit availability notifications. Thank you so much if you do use this service!

Trail Stats
Length: 72.2 miles
Elevation gain/ loss: +15,000, -13,500 ft
Time to complete: 5-10 days
Location: Sequoia National Park, CA
Permits Required: YES
Pets Allowed: NO
Trailheads: Crescent Meadow (west), Whitney Portal (east)
Resupply Available: NO
Why should you hike the High Sierra Trail? Why shouldn’t you? is the real question. This trail takes you on a grand tour of Sequoia National Park: from the Sequoia groves on the western slope of the Sierra, over the grand Great Western Divide through the Kaweah Range, passing by beautiful lakes and tarns, and through not only a jaw-dropping glacier-carved valley, but also along the Kern River in the Kern River Canyon. And of course, ending with the tallest mountain in the lower 48 states, Mt. Whitney. The HST is an awesome alternative, or a stepping stone, to the John Muir Trail if you can’t swing the time off of work, or need a little taste of a thru-hike. You will for sure leave this trail craving more of the beautiful Range of Light.
High Sierra Trail with Moraine Lake alternate
How To Start Planning
Permits
Sequoia National Park, and all of the High Sierra, requires wilderness permits for overnight trips into the backcountry. The High Sierra Trail is growing in popularity, but is not yet as competitive as permits for the JMT, for instance.
Advance Reservations:
New for 2021: SEKI has moved their wilderness permitting to recreation.gov. Permits will now be available 6 months prior to your permit start date. This change allows for permits to be “live”, so you can see real-time updates for which permits & trailheads are available. A downside to this is needing to reserve a permit without really knowing what the snowpack will look like in the mountains for that year. When making your permit reservation, note that you cannot edit your entry trailhead or start date, but you can change your exit trailhead and finish date. Permits cost $15 + $5/person.
You still need to pick up your actual permit at the wilderness/visitor center that issues permits for your trailhead. For the HST, that is Lodgepole Visitor Center. You can pick your permit up as early as 1 pm the day before your trip, or the morning of (no later than 9 am). Pay attention to center opening/ closing times as they vary throughout the year. When you pick up your permit, the ranger review your planned itinerary with you. The #1 tenant of Leave No Trace is to Plan Ahead and Prepare. You should know your itinerary when you pick up your permit. The ranger wants to make sure you are prepared for the hike, and if anything were to go wrong, they have a record of your route to assist in a SAR.
Outside of the quota dates (generally early October - late May), permits are self-issued, free, and not subject to limits. You can obtain them yourself at visitor center drop boxes. I will not be discussing permits for a westbound hike in this blog post. To obtain permits in this direction, you will need to enter the Mt. Whitney Lottery.
First Come, First Served:
Walk-up permits are available for the HST. They set aside 1/3 of the quota spots for each trailhead (for the HST, that is 10 people). You can get one at the Lodgepole wilderness center starting at 1 pm the day before you wish to depart. You cannot get the HST permit from any other permitting center, as all of the centers only issue permits for trailheads closest to them, not the whole park. When we were picking up our HST permit the day before the hike, we noticed many openings available (6, I believe) for starting the HST the following day. We started our hike on August 15, 2019, which is generally after the school year has started in this area, so that could have contributed to the availability. There was also the “Hamilton Blowout” that was scaring off many people. I’m sure many surrendered their permits, allowing for more openings this summer. But still, 10 people/day for a walk-up permit is pretty good odds.
Transportation
The most daunting part of planning a HST hike is the transportation to/from the trailheads. The HST crosses the Sierra Nevada, and the Southern Sierra is known for not having any roads bisecting the range. It is possible to plan, you just have to be flexible, and understand there are no fast or easy ways.
A Willing Friend/ Family Member
This is the best option for you, and the worst option for the poor soul you’ve suckered into driving long distances to shuttle you around. My mom and I convinced my dad that it would be lots of fun to drive from the Bay Area near San Francisco, camp at Lodgepole Campground, very close to the beginning of the trail, and then for him to drive to Whitney Portal to pick us up at the end of our hike, a week later. He will give his own dramatic retelling of his long road trips, but this worked out very well for us.
Two Shuttle Cars
If you are going in a group, this is probably the best option. You’ll drive two cars to Whitney Portal if hiking eastbound (or Crescent Meadow if hiking westbound), park one of the cars there, then drive the other car to your starting trailhead. Once you finish your hike, you’ll drive the end car to the beginning car to retrieve it.
For this hike in particular though, I think it would be better to use the town of Visalia to your advantage, instead of driving into Sequoia National Park from the west side twice (which is on winding roads known for long construction delays). From Visalia, you can take a paid shuttle into the park, then utilize the park’s free shuttle system to take you to the wilderness center to pick up your permit, and then to the trailhead. Visalia also has hotels that allow long-term parking, so you can leave your car at one of those places for a fee. The best part? All of these hotels are on the paid shuttle route. Convenient, right?
Public Transportation
As I mentioned above, Visalia is a key town on the western side of the Sierra for organizing transportation. And, if you only have one car, you have two options, depending on when you want to take public transportation on your trip.
Drive your car to Whitney Portal. Then take the East Side Sierra Shuttle from Whitney Portal to Lone Pine (or hitchhike), then take the Eastern Sierra Transit bus from Lone Pine to Mojave. You will then take a Greyhound bus from Mojave to Visalia. Then, you will take the Sequoia Shuttle from Visalia to the Giant Forest. Once in the park, you will need to take the free park shuttle from the Giant Forest to Lodgepole to pick up your permit, then take the same shuttle back to the Giant Forest and transfer bus lines to go to Crescent Meadow. Once you finish your hike, your car is waiting for you at Whitney Portal and you can drive home. This is probably the best option, as you get the long traveling stuff out of the way at the beginning of your trip, and have your own vehicle at the end of the hike, when you’re probably craving some comforts and ready to get home ASAP.
If you want to drive to Crescent Meadows, or Visalia, first, you’ll have to do the public transit steps at the end of your trip.
If you are coming from south of Lancaster, it may be worth it to see if any hotels in the area allow for long-term parking, then take the Greyhound from Lancaster to Visalia, and at the end of your trip, take the Eastern Sierra Transit bus from Lone Pine to Lancaster.
This method can be really inflexible since you have to rely on strict schedules.
If you need to completely rely on public transportation since you don’t have a vehicle, you’ll need to identify the best way to get to Visalia, Mojave, Lancaster, or Bakersfield from your home.
If you are flying, it is probably easiest to fly into Reno or LAX, and then take a combination of the above options and see if other busses are running. Thankfully, Google Maps has a really great public transportation feature on their maps for figuring out bus routes.
Hitch-hiking
Not the most reliable method, but it is possible to hitchhike to/from your parked car.
Itinerary
Which Direction?
Most people attempting the HST will hike eastbound, from Crescent Meadow to Mt. Whitney, and I think it is the best option for most people, for a variety of reasons.
Permits. It is much harder to obtain a permit beginning at Whitney Portal than at Crescent Meadow. Even though your itinerary is taking you out of the Whitney Zone, you are still going to be lumped in with the backpackers wanting to only do Mt. Whitney. There are more hikers vying for an overnight Whitney permit than for a permit beginning at Crescent Meadow.
Acclimatization. Crescent Meadow sits at 6,500 ft above sea level and Whitney Portal is at 8,300 ft, almost 2,000 ft. higher. When you start at Crescent Meadow, you will probably not go above 8,000 ft on your first day, whereas if you start at Mt. Whitney, you are either aiming for a summit on your first day (14,505 ft) or at least to Trail Camp (~12,000 ft). Anyone can fall victim to Acute Mountain Sickness (AMS), even the most experienced mountain adventurers. If you start at Crescent Meadow, you’ll have plenty of time to get used to the higher elevations.
Ease of Hike. Maybe more subjective, but I think it is easier to do Mt. Whitney without a pack full of a week’s worth of food and gear. Also, now having done the descent on the eastern side of the mountain, I have no desire to hike up that way. It just looks painful! But if you enjoy a physical challenge, by all means, go for it!
“Grand Finale”. This is a little more nostalgic, but ending on Mt. Whitney is much grander than ending at a parking lot! Of course, you’re really ending your hike at Whitney Portal, which is a parking lot, but I think having the Mt. Whitney summit as something to look forward to your whole hike is motivating!
Where to Camp?
On the High Sierra Trail, you will have the ability to disperse camp, or camp anywhere you’d like, as long as you abide by Leave No Trace principles: camp at least 200 ft (the minimum in SEKI is actually 100 ft) from trails and water, and don’t build new fire rings.
However, the HST also has some designated campsites with bear boxes. So, it is possible to hike the whole HST without carrying a bear canister, so long as you stick to camping in designated sites only. I believe that most HST hikers stick to camping in designated sites, just because the sites are spaced out so well, and there’s usually a point of interest nearby. However, there were a few places that I’d want to camp at that aren’t at a designated spot.
List of Designated Campsites along the HST with a bear box (NPS mileages):
Mehrten Creek - 5.8 miles
Nine Mile Creek - 8.8 miles
Buck Creek - 10 miles
Bearpaw Camp - 11.2 miles
Upper Hamilton Lake - 15.3 miles
Big Arroyo - 23.3 miles
Moraine Lake - 30 miles
Kern Hot Springs - 37 miles
Junction Meadow - 45 miles
Wallace Creek - 49.5 miles
Crabtree Meadow - 54 miles
As you can see, there are no bear boxes in the Whitney Zone past Crabtree Meadow. If you are hiking without a bear canister, your last camp must be Crabtree Meadow, and you must exit the Whitney Zone at Whitney Portal without camping in the zone, as bear canisters are required in the Whitney Zone.
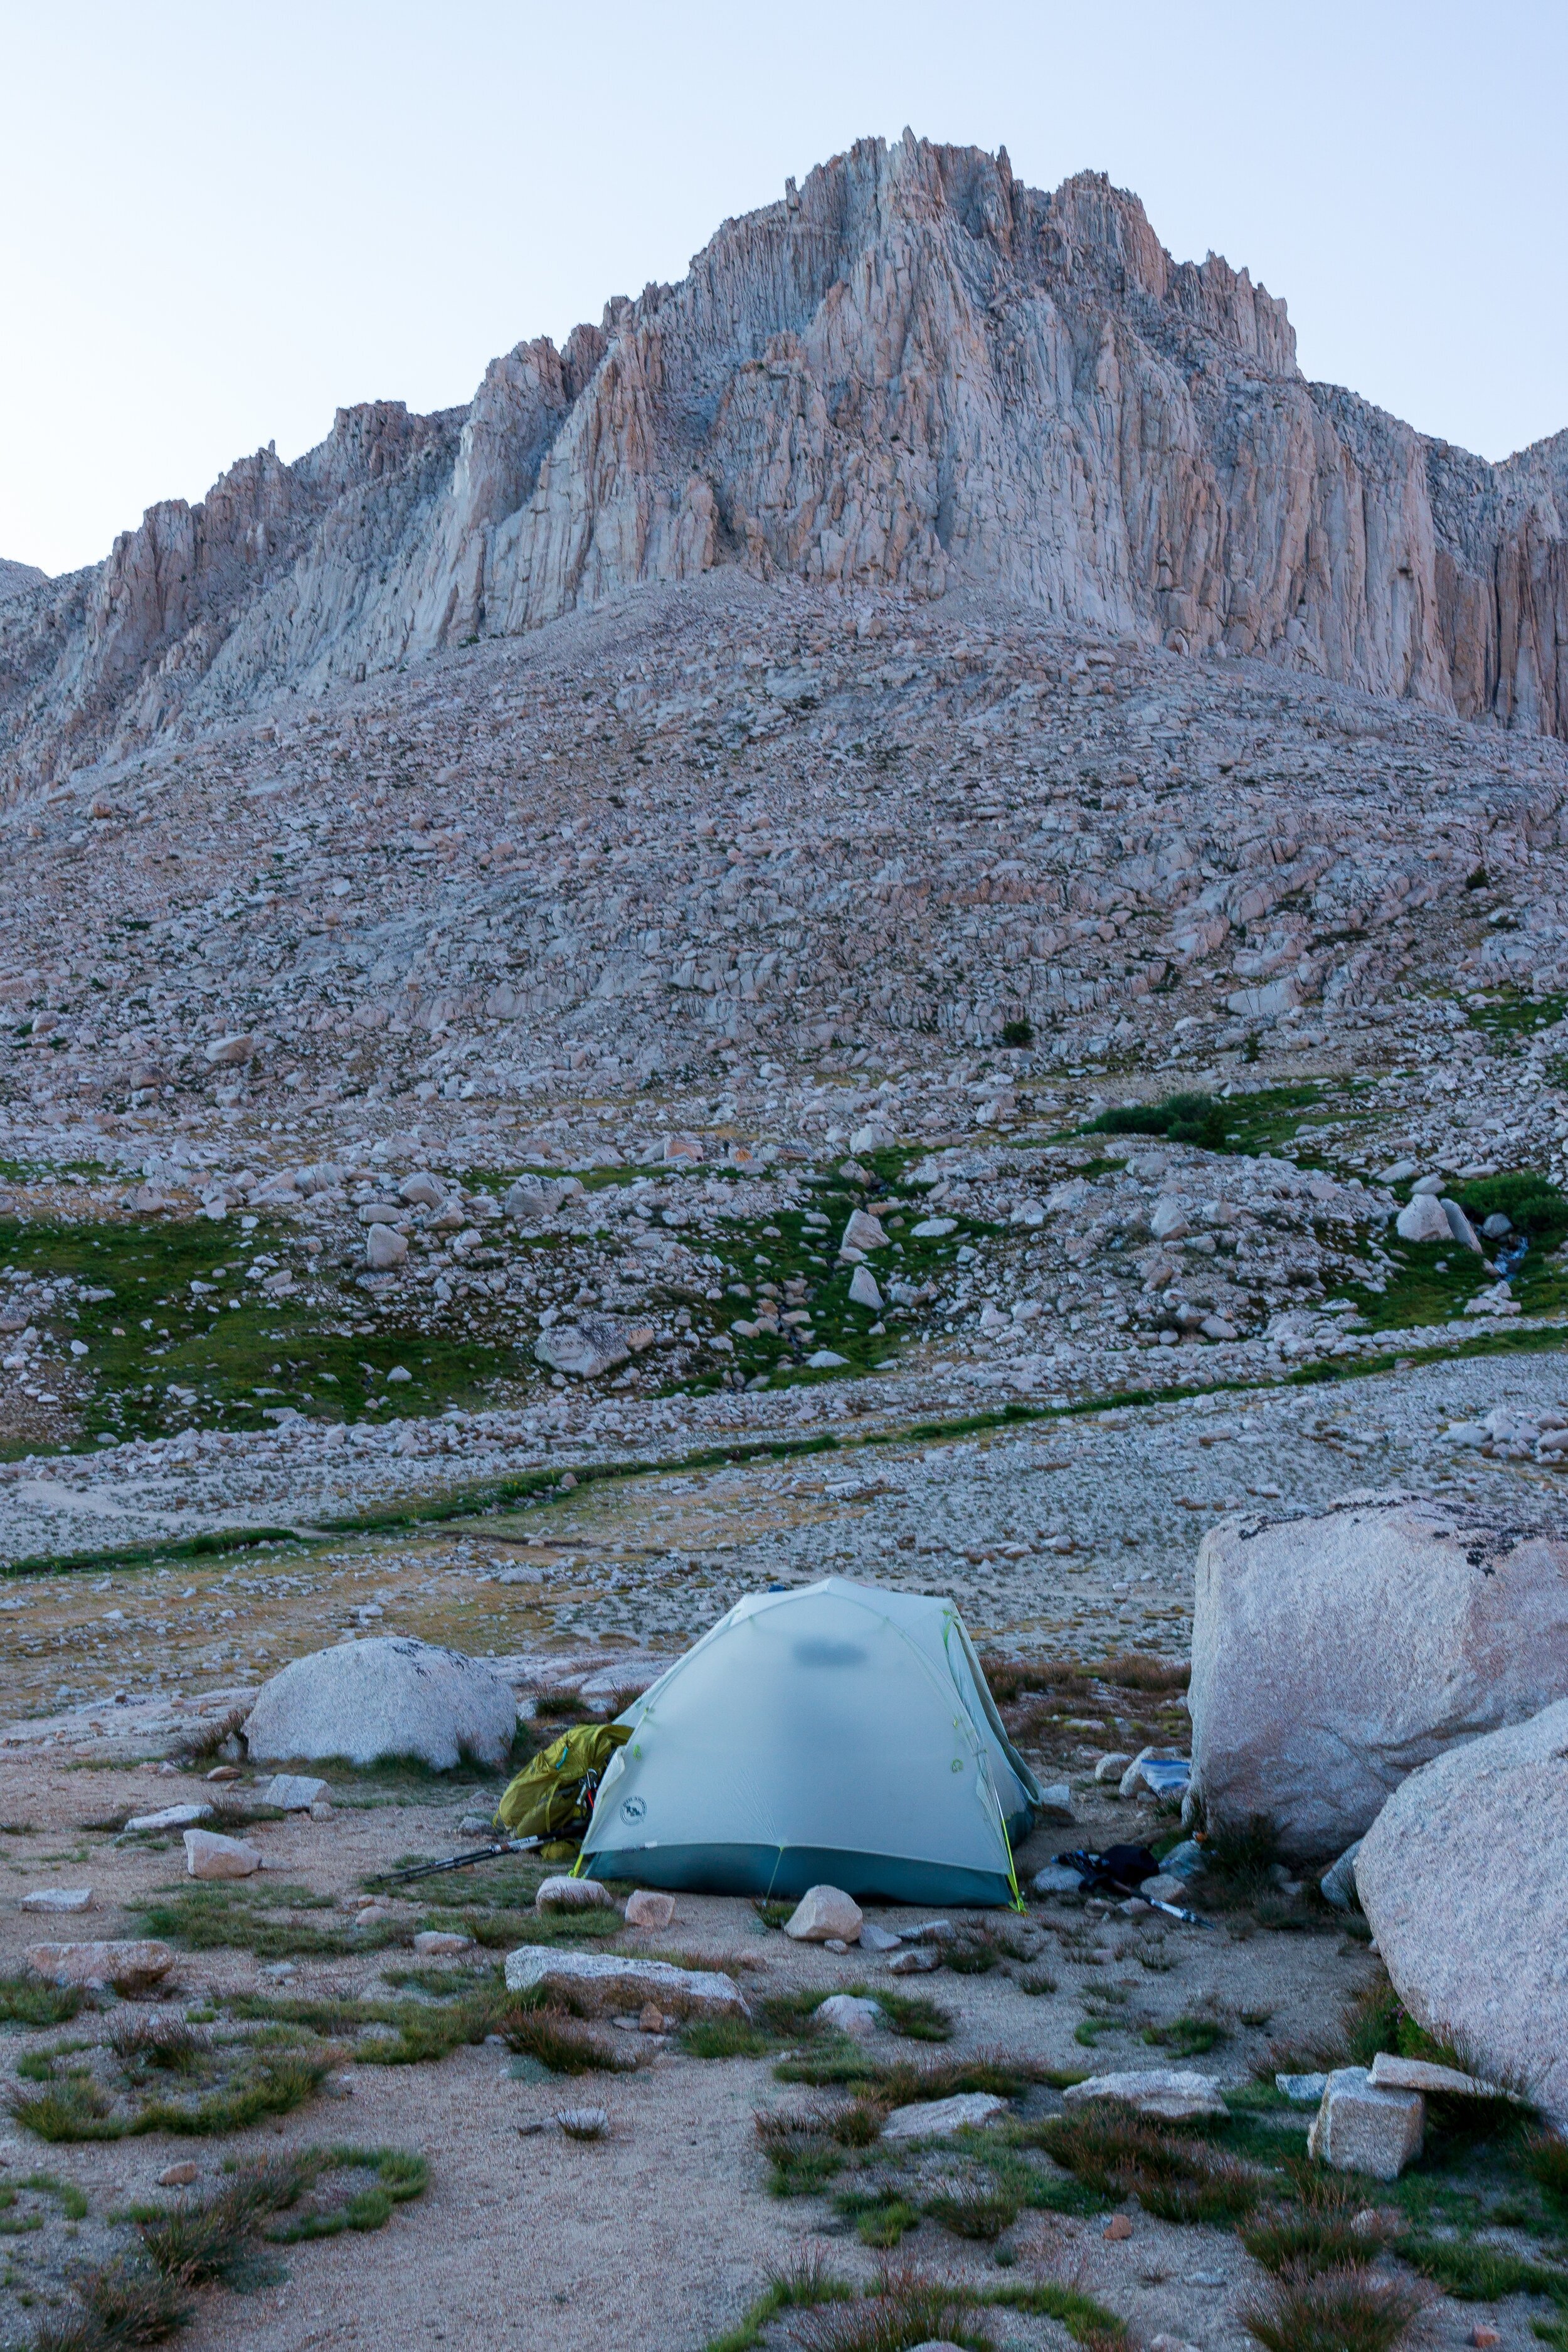
Our Itinerary:
Day 1 - Crescent Meadow to Buck Creek: 9.25 miles, +3,000 & -2,500 ft
Day 2 - Buck Creek to Hamilton Lakes: 4.7 miles, +2,500 & -1,500 ft
Day 3 - Hamilton Lakes to Moraine Lake: 12.7 miles, +3,900 & -2,900 ft
Day 4 - Moraine Lake to Junction Meadow: 13.8 miles, +1,600 & -2,800 ft
Day 5 - Junction Meadow to Guitar Lake: 10.7 miles, +4,400 & -1,000 ft
Day 6 - Guitar Lake to Trail Camp: 8.4 miles, +3,500 & -3,000 ft
Day 7 - Trail Camp to Whitney Portal: 5.9 miles, +250 & -3,900 ft
All mileages and elevation taken from CalTopo.
For the most part, I really liked our itinerary. If we didn’t have to deal with the Hamilton Blowout this year, I probably would have wanted to go up to Precipice Lake to camp because the high alpine views are stunning up there! There was also a great campsite just below Kaweah Gap. There were also many campsites on the Chagoopa Plateau with beautiful views of mountains on the way to Moraine Lake. And of course, the campsites at Guitar Lake are stunning and well worth a trip. Trail Camp was also gorgeous, but unfortunately, had a ton of litter and abandoned WAG bags from lazy hikers.
Other Itineraries:
The HST is a great trail for super in-shape, speed hikers, and for beginners! This trail can easily be adapted for a faster or slower pace. I would say that our pace/ itinerary was the average, with some groups moving slower, and some faster.
Here are a couple of examples of a faster/ slower itinerary than ours, that still hit good spots on the trail:
Slower Itinerary:
Day 1: Crescent Meadow - Nine Mile Creek
Day 2: Nine Mile Creek - Hamilton Lakes
Day 3: Hamilton Lakes - Big Arroyo
Day 4: Big Arroyo - Moraine Lake
Day 5: Moraine Lake - Kern Hot Springs
Day 6: Kern Hot Springs - Wallace Creek
Day 7: Wallace Creek - Guitar Lake
Day 8: Guitar Lake - Trail Camp/ Outpost Camp
Day 9: Trail/ Outpost Camp - Whitney Portal
Faster Itinerary:
Day 1: Crescent Meadow - Hamilton Lakes
Day 2: Hamilton Lakes - Moraine Lake
Day 3: Moraine Lake - Wallace Creek
Day 4: Wallace Creek - Tarn above Guitar Lake (OR, bivy/ cowboy camp at sites just below the Trail Crest junction on west side of mountain)
Day 5: Tarn Above Guitar Lake - Whitney Portal
Faster Itinerary #2 (less scenic campsites):
Day 1: Crescent Meadow - Bearpaw HSC
Day 2: Bearpaw HSC - Big Arroyo
Day 3: Big Arroyo - Junction Meadow
Day 4: Junction Meadow - Guitar Lake
Day 5: Guitar Lake - Whitney Portal

The Moraine Lake Alternate?
I haven’t heard of too many people skipping Moraine Lake on the HST, even though its not on the HST. I’m sure the hike on the Chagoopa Plateau is nice, and it is about 0.25 miles shorter, but Moraine Lake is just so dang beautiful! And the camping at the lake is really great (though, definitely buggy in prime mosquito season). So, I have no reason to promote skipping the real HST, because I didn’t do it, but I’d highly recommend doing the detour to Moraine Lake. If this picture doesn’t convince you, then I’m not sure what will.
Season/ When To Go
Like most mountain hiking trails, the High Sierra Trail is really only accessible during the summer months for traditional backpacking. The Sierra summer season can vary wildly from year to year, and it really depends on the amount of snow that accumulated the prior winter, and springtime temperatures. Using 2017 and 2019 as two recent examples: both years had an enormous amount of snowfall in the winter, but in 2017, trails were accessible slightly earlier in the season, due to the incredibly fast (and dangerous) melt period, which caused creeks to swell past flood stage. 2019 saw a cooler spring, with the melt happening later in the season. When I hiked the HST at the end of August 2019, the Wallace Creek crossing was the same height and flow as when I crossed that creek in early June 2018 (a low snow year).
What does this mean? It means that when you are planning your HST hike, or any Sierra hike (or any hike at all), you should be familiarizing yourself with the weather patterns leading up to your hike. You should also know yourself and your skills well enough to make an educated decision about whether or not to proceed when faced with a hazard on the trail. For these reasons, it is hard to give a set-in-stone layout of when you should hike the HST, but I’m going to try to give advice for a year that would see 100% snowfall, based on April 1 measurements. Note: There is almost always a snow chute on Mt. Whitney, about 0.5 miles from the summit.
May: Not accessible unless there is a super low snow year and high temperatures, or you are expecting to mountaineer the trail. Some years (low snow), Memorial Day weekend can be an ok time to start, so long as you are prepared for snow on passes and a winter Whitney summit (crampons & ice axe).
June: Depends on the snowfall and spring temperatures. Even with a lower snow year, you can expect to have snow on the northern side of passes, and will most likely have snow on Mt. Whitney. Microspikes are required, an ice axe may or may not be indicated. If you decide to bring an ice axe, should know how to use it for self-arrest before hiking. If it is a low snow year, the end of June will have almost no snow on the trail. Mosquitos will be out in full force by the end of the month. Weather is generally good: warm days and cool nights. Creek crossings will be high, proper creek crossing technique is necessary. Meadows and trails will be muddy: must be willing to stay on trail and not create “braided trails” to keep feet dry.
July: In a normal snow year, the trail will be mostly clear of snow, but may have some lingering snow around Precipice Lake & Kaweah Gap and near Guitar Lake/ Whitney. Streams will be running well, sometimes overflowing on the trail, and can have some difficult crossings. Feet will be wet. Meadows and trails will be muddy: must be willing to stay on trail and not create “braided trails” to keep feet dry. Mosquitos will be heavy. Wildflowers will be present, meadows will have green grass. Warm days and warm nights, with day & nighttime temps colder in the Whitney Zone. Afternoon thunderstorms are possible. Wildfire smoke and wildfires can be a concern.
August: Clear trails, lower creek crossings with many rock-hoppable crossings. Possible to have dry feet the majority of the hike. Mosquitos are dying down, as are wildflowers. Days are hot, especially at lower elevations (can easily see 90* F days), and nights are warm. Nights will start cooling off towards the very end of August. Day & nighttime temps colder in the Whitney Zone. Afternoon thunderstorms are possible. Wildfire smoke and wildfires can be a concern.
September: Possibly the best month for backpacking in the Sierra. Snow-free trails, low creek crossings. Some small streams have dried up. Possibility of a snow storm, usually late September, but usually not big enough to end hiking season. Cooler days and nights, nights will get below-freezing. Thunderstorms are still possible in the afternoon. Mosquitos are gone, but so are wildflowers & meadows are not very green anymore. Less crowds. The Whitney Zone has cooler temperatures than the rest of the trail. More possibility for ice on trail from overnight freezing. Wildfire smoke and wildfires can be a concern.
October: Another good backpacking month for those who are prepared. Winter storms could come at any time, but overall, October is a pretty pleasant month, and you could do a successful HST hike. Temperatures will be much cooler than September, but the days are sunny. The Whitney Zone will be very cold, with below-freezing days and nights. It is worth re-iterating: a large snowstorm could end your hike at any time. Know bail-out points (not many on the HST) and be prepared for cold temperatures. Wildfire smoke and wildfires can be a concern.
November: This is usually the month when season-ending snowstorms fall in the Sierra. This changes every year, but thru-hiking is not recommended at this time unless you have a very clear weather window and are prepared for single-digit temperatures (F). All the same precautions for September and October also apply here.
I highly recommend following the park’s wilderness conditions page throughout the spring and summer to give you an idea of the current trail conditions.
Resupply
There are no resupply options on this trail, nor are they necessary. We did see some hired packers doing resupply services for a large group that was taking 2 weeks to complete the trail, so it may be worth looking into if you feel you cannot carry enough food for a week. If going eastbound, it is possible to buy all of your food at the Lodgepole market store if you eat a “hiker trash diet'“. There were tons of bars, beef jerky, chips, and mountain house meals available for purchase, but it is probably easiest and cheapest to purchase ahead of time, and you will need to purchase in advance if you have dietary restrictions.
Training
As with most hikes, my training philosophy is: training will make the hike easier, and make you less susceptible to injury, but even if you don’t train, as long as you give yourself an appropriate itinerary, you will probably be just fine. So yes, put a weighted pack on and hit the Stairmaster as much as possible, go on as many training hikes as you can, but if you can’t fit that many into your schedule, you will probably be OK. If you are sticking to trails in the Sierra, you’ll find they are pretty forgiving, as they are graded for stock use. Just don’t try to break any speed records, and try to lighten your pack weight as much as possible to make up for the fact you’re going to have to carry more food if your trip is long.
Acclimatization is a worthy endeavor, however. If you can stay for 1-2 days in the Lodgepole area before starting your hike, especially if you are coming from sea level, your lungs will thank you, and you will be less likely to acquire AMS.
Gear
My High Sierra Trail Gear List, including post-hike commentary.
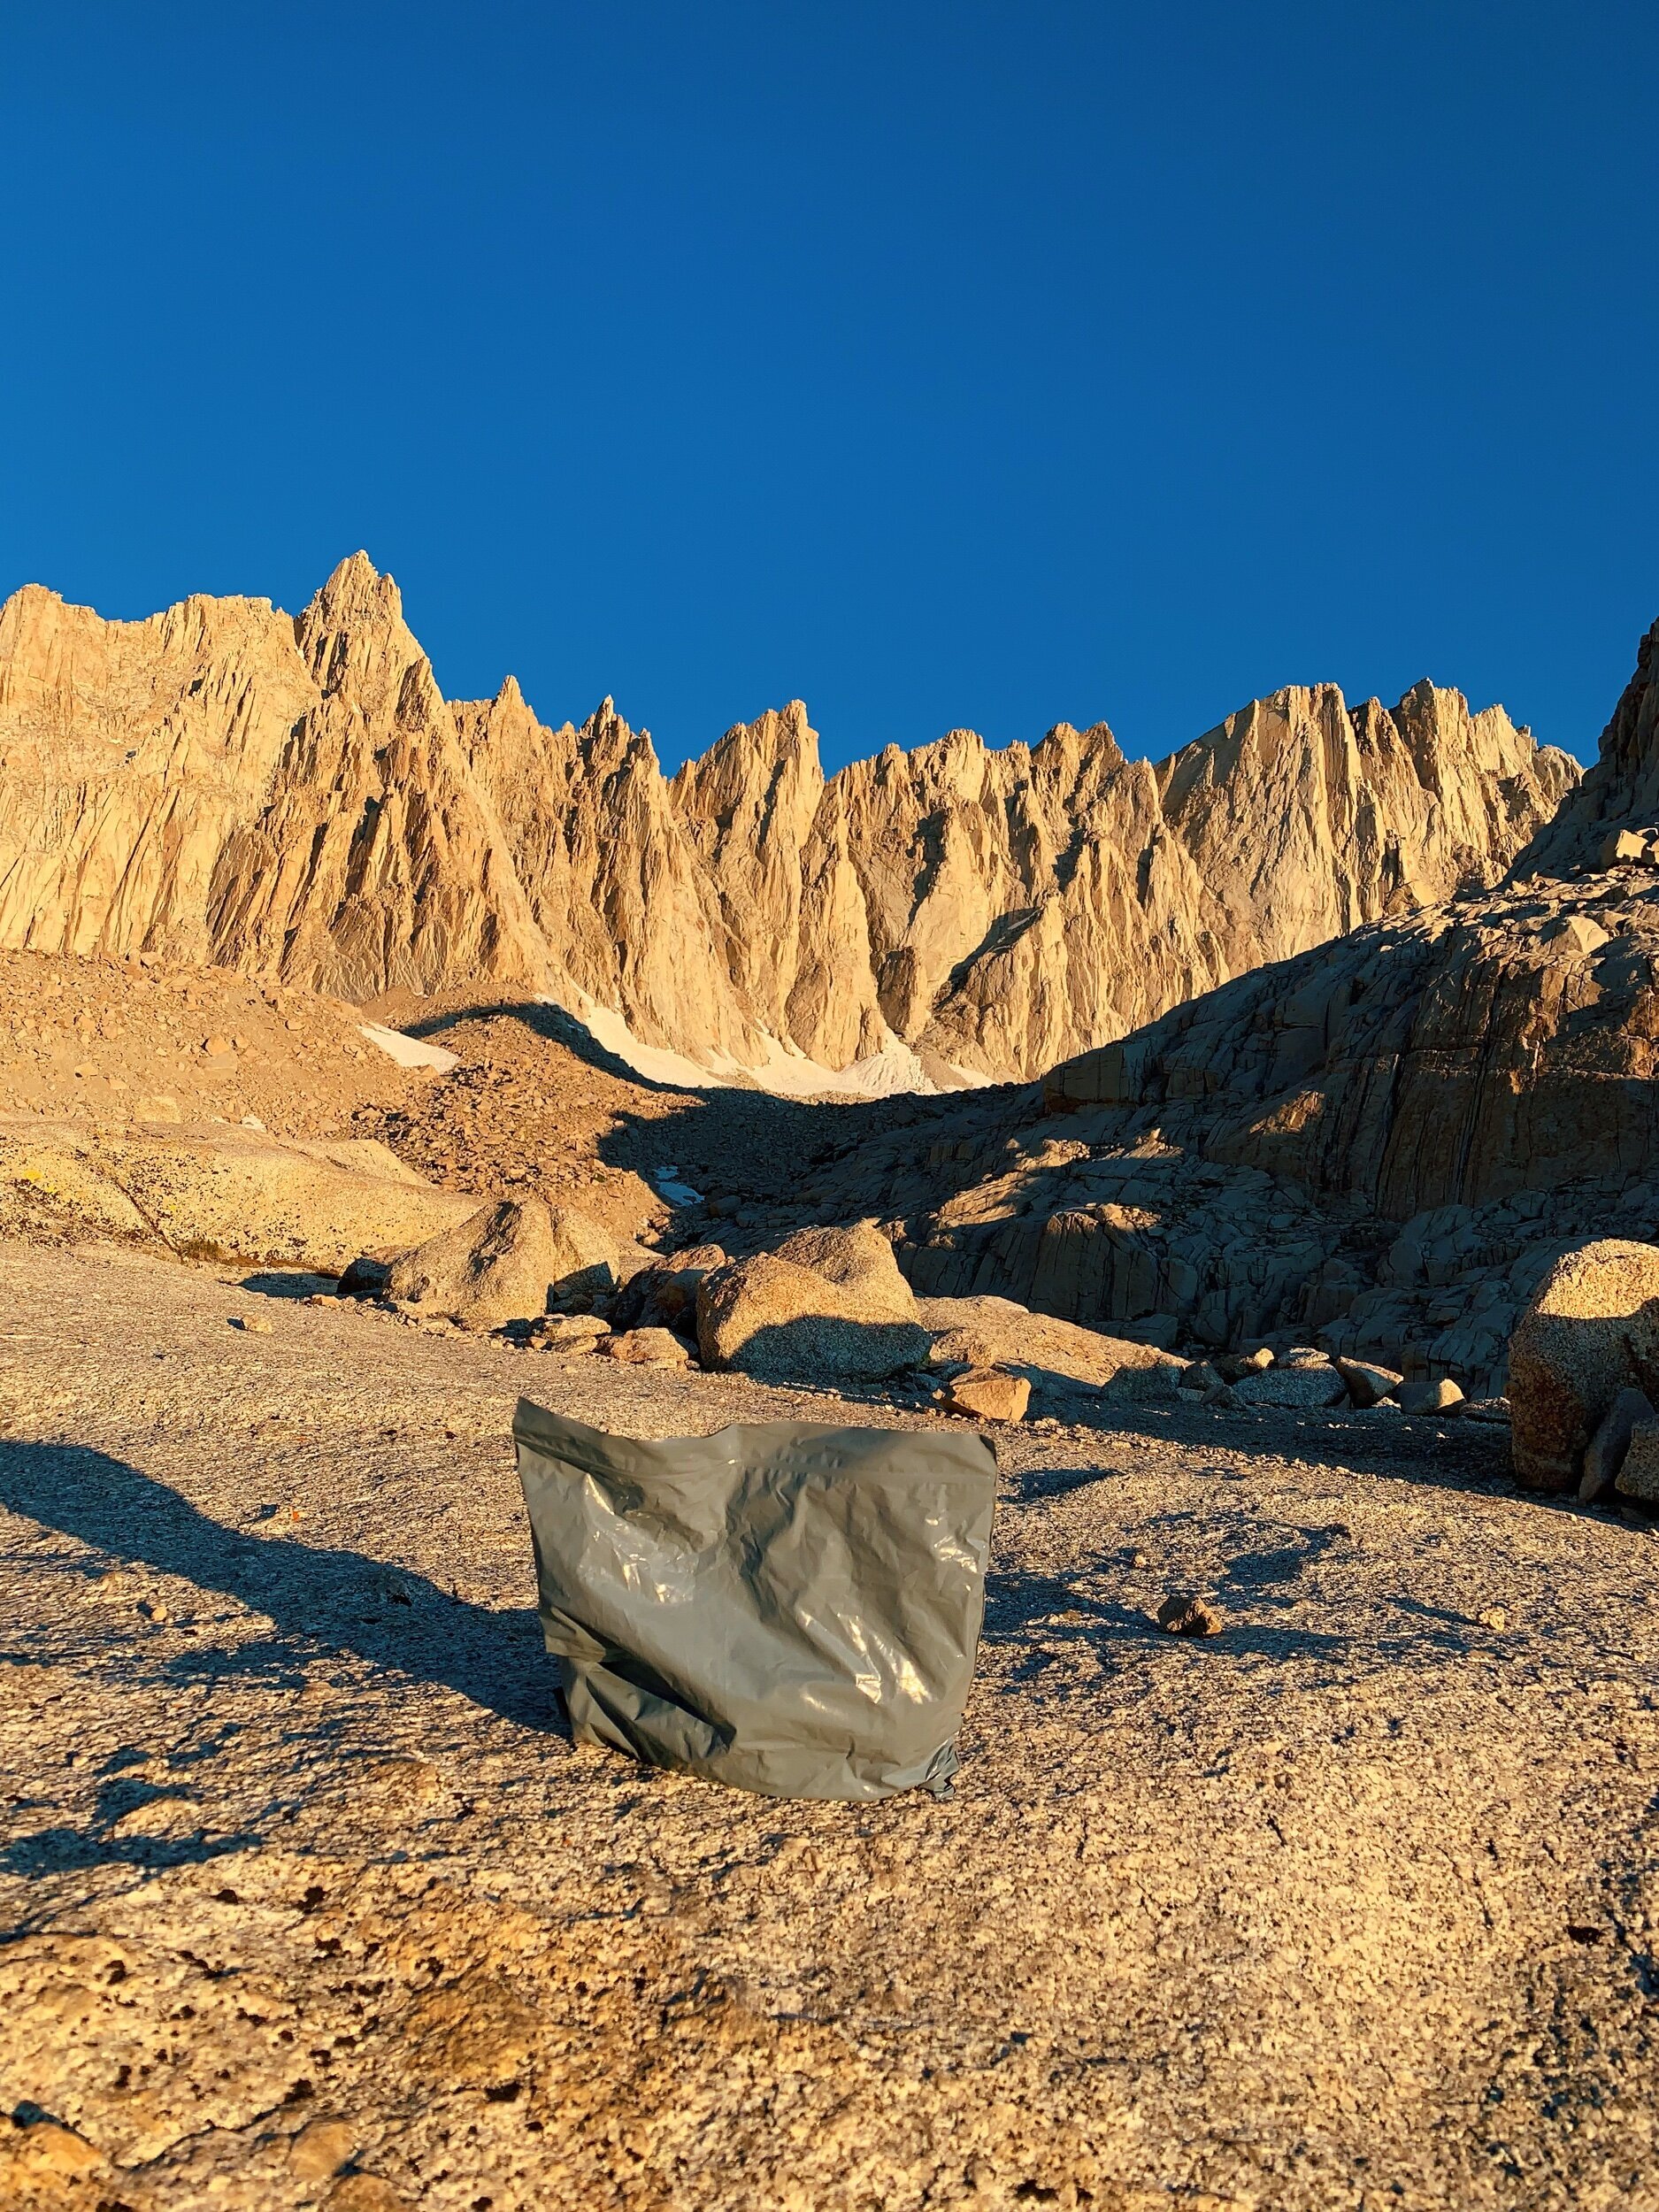
Wag Bags
I believe that Wag Bags deserve their own section in the gear category, just because not everyone knows about them, and even fewer people know the proper waste disposal above treeline.
So, what’s a Wag Bag? It is a double bag system that you go #2 in. There is a very large bag filled with a neutralizing chemical powder gel with a large opening that you lay on the ground, aim, and go #2 in, and toss your TP in. Then you pick it up, roll the top down, tie a knot in it, then place it in the zippered bag made of the same material. Unfortunately, the system is not smell-proof, especially when it is hot out. You can get another freezer gallon ziplock to put the bag in, or an Opsak to help with the odor.
When do you need to use a Wag Bag? They are called for in certain conditions. 1. When the ground is frozen and you are unable to dig a hole. 2. When the ground is covered in snow and you are unable to dig a hole in soil. 3. In certain desert environments. 4. In high alpine environments (any time above treeline). 5. In very high use areas without privies.
Why do you need to use a Wag Bag? In all of the above situations, the reason for using a Wag Bag is because its either enormously difficult or impossible to dig a proper hole (6-8 in deep and wide), or, if the ground/ soil cannot properly break down your excrement. In places like the desert and high alpine, the soil is just not able to handle our poop, and can’t decompose it. In the Whitney Zone, there are 100’s of people there every single day. Much of the Whitney Zone is above treeline, in rocky terrain, where digging a hole is almost impossible anyways, and there are also many places along the trail where it is impossible to get at least 200 ft away from the trail to dig a hole, even if you could dig a hole (which you can’t). Can you imagine running into 100’s of people’s poop on the trail? Talk about disgusting and unsanitary. That’s why Wag Bags are great.
What do I do with the bag after I’m done? You need to put the bag in your backpack and carry it back into civilization with you, where you can then place it in a garbage can. Let me repeat: YOU NEED TO CARRY YOUR WAG BAG OUT OF THE WILDERNESS WITH YOU.
Do NOT:
Leave it at your campsite
Bury it under rocks
Leave it on the side of the trail to pick up “later”
Do you know what’s worse than surface pooping? Leaving your poop in a double-layered plastic bag alongside a trail for it to never decompose. If you hike on the Mt. Whitney Trail, you will be disgusted by the amount of abandoned Wag Bags there are. No one cleans up after you, OK? Pick up your poop, pack out your trash, and for the love of Mother Nature, stop leaving toilet paper on the trail! I don’t care if you claim you’ll pick it up on your way down. No, you won’t. You’ll forget, or some other lazy person will put their used Wag Bag next to yours and you’ll get to the spot and go “ewwwww someone left their bag here too and IDK which one is mine! I’m just going to leave both of them here because I can’t possibly pick up the wrong bag!”. Sorry for the sass here, but you are littering if you leave your Wag Bag to “pick up later”. Also, animals can get into your bag while it is laying there unattended, and make a huge mess of it.
Moral of the Story? Use your Wag Bag, keep it with you, throw it in a garbage can after your trip. At Whitney Portal, there are so many people throwing out Wag Bags that they actually have special bins just for Wag Bags. So you don’t even need to get in your car with it!
Wag Bag tips for the HST: We were given a Wag Bag by the ranger issuing our permit in Lodgepole even though you probably won’t need to use a Wag Bag until you get to the Whitney Zone. If you are staying at Hamilton Lakes, you’ll use the pit toilet available, but if you are camping near Precipice Lake or Kaweah Gap (both above treeline), or there is too much snow on the ground for you to dig a cat hole in the soil, you’ll need to use a Wag Bag. There are also new Wag Bags placed at the Crabtree Meadows/ JMT trail junction in a bin for you to take into the Mt. Whitney Zone. These bags are only there when a ranger is present at the Crabtree Meadows station, so if you are early or late in the season (early June/ October-beyond), you need to have your own Wag Bag. (This has been discontinued since the COVID-19 pandemic.)
Special considerations:
Mt. Whitney will be much colder than the rest of the trail, even if you don’t plan on a sunrise summit. Even if your hike is forecasted with 90* F days, don’t skimp on an insulating layer, lightweight, but warm, gloves, and possibly a beanie or balaclava.
Since afternoon thunderstorms can be common, don’t forget to bring a rain jacket!
You will probably need to carry a bear canister. We were asked by the ranger what our food storage method was when we picked our permit up, and I got the feeling that saying the NPS provided bear boxes would not be an appropriate answer without having some kind of back-up. So if you aren’t going to carry a canister, and rely on the bear boxes, make sure you have a food bag & line to hang just in case the boxes are full or you don’t make a planned campsite. Also note that your last campsite will have to be Crabtree Meadows if you do not bring a bear canister.
WAG BAG.
Questions? Drop them below!
Want to read about my trip on the High Sierra Trail? Click here.